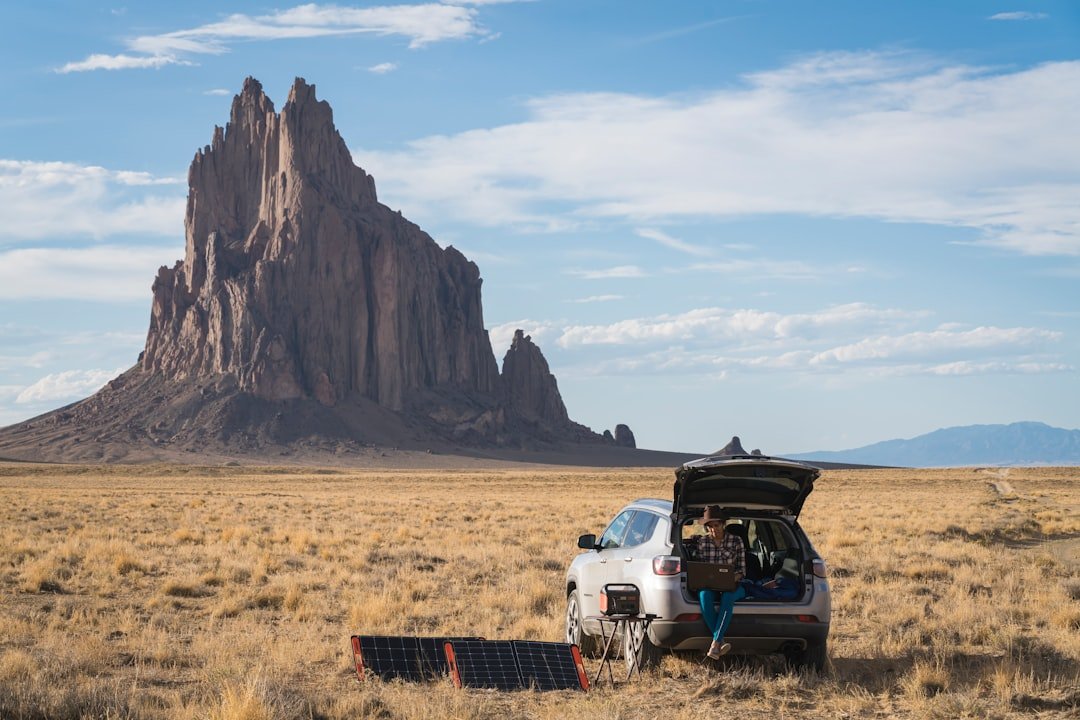
The freedom of van life doesn’t mean sacrificing connectivity. Whether you’re working remotely while exploring national parks or streaming movies after a day of hiking, reliable internet has become essential for modern travelers. The Starlink Mini satellite internet system has revolutionized how van lifers stay connected, offering high-speed internet in locations where cell service is non-existent.
Installing a low-profile Starlink Mini setup on your campervan opens up incredible possibilities. You can work from breathtaking locations, keep in touch with family, access emergency services, and enjoy entertainment wherever your adventures take you. The compact design won’t ruin your vehicle’s aerodynamics, and when properly installed, it sits below your solar panels to minimize wind resistance.
Why Starlink Mini for Van Life?
The Starlink Mini has emerged as the premier satellite internet solution for van life enthusiasts because of its compact form factor, affordable price point, and performance capabilities. Unlike traditional satellite internet systems that require massive, permanently mounted dishes, the Mini is portable and can be installed low-profile on your roof or even used indoors when parked near a window.
For van conversions with limited roof space—especially those already packed with solar panels—the Mini’s small footprint is a game-changer. The system delivers speeds that rival home broadband connections, typically providing 50-200 Mbps download speeds depending on your location and obstructions. This bandwidth easily supports video calls, streaming, and multiple devices simultaneously.
The portability factor means you can also remove the dish and use it outside your van when parked under heavy tree cover. Many van lifers keep a longer cable specifically for this purpose, setting up the dish in a clearing while staying inside their vehicle. This flexibility is unmatched in the satellite internet market. If you’re looking for reliable satellite internet options for your van build, the Mini delivers exceptional performance in a compact package.
Planning Your Installation
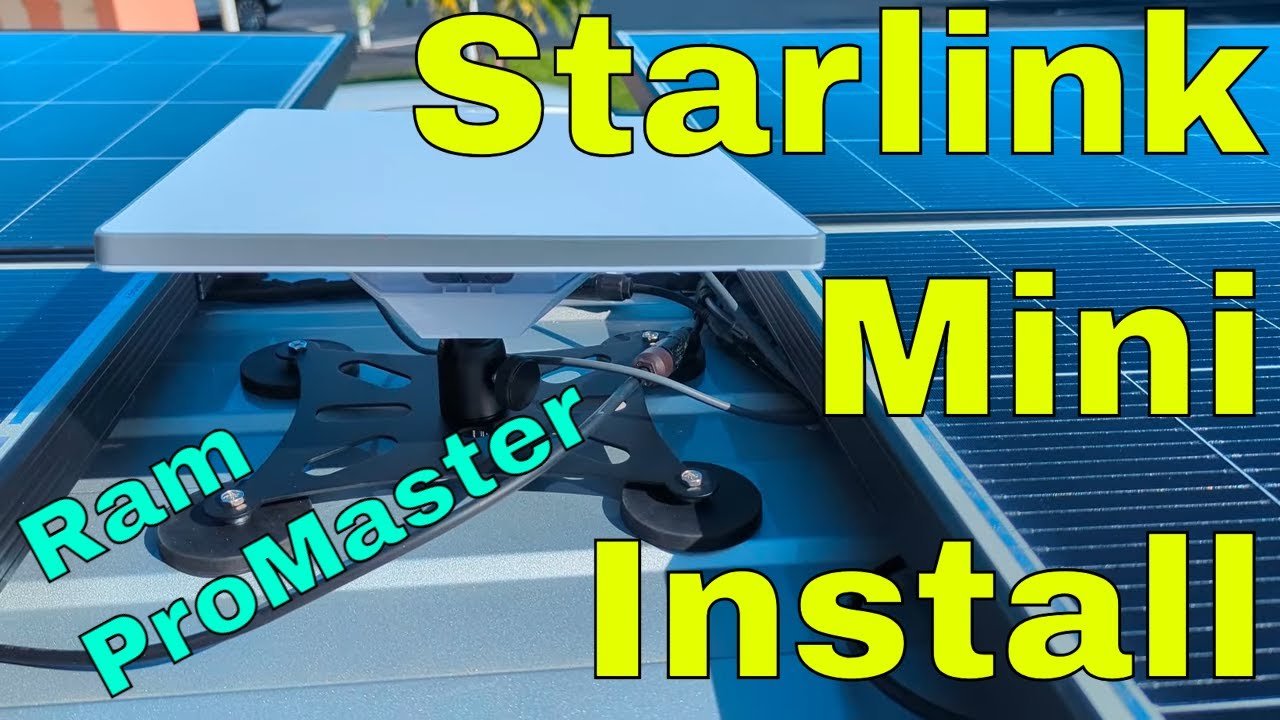
Before drilling any holes, careful planning is essential for a clean, professional installation. The positioning of your Starlink Mini relative to solar panels, roof vents, and other obstructions significantly impacts performance. A low-profile mount keeps the dish below your solar panels, reducing wind resistance and maintaining stealth.
Key considerations include roof structure, routing paths for cables, and avoiding interference with existing equipment. You’ll want to position the dish as close to the center of the van as possible while maintaining adequate clearance from vents and fans. Center positioning improves balance and reduces the lever arm effect during wind events.
Modern low-profile mounting brackets, like the Pleasantly Starlink Mini Aluminum Alloy RV Bracket, allow you to replace the stock kickstand with a magnetic roof mount that sits much closer to your roof line. This modification can lower the dish height by 2-3 inches compared to standard ball mounts, keeping it below solar panel height for better aerodynamics and protection.
Tools and Materials Needed
A successful installation requires some specialized tools and components beyond the Starlink Mini kit itself. You’ll need rivnuts and a rivnut installation tool for creating secure mounting points on thin metal surfaces. A step bit works well for creating clean holes through the roof, and self-leveling sealant is essential for waterproofing all penetrations.
The mounting kit typically includes magnetic feet that attach to the bracket, providing a secure connection to your roof without additional drilling for the mount itself. However, routing the power and Ethernet cables through the roof requires wire glands and proper waterproofing techniques.
For cable routing, consider black solar cable entry glands that allow you to pass both power and data cables through the roof while maintaining a watertight seal. These glands accommodate multiple wire sizes and are designed specifically for the curved roof profiles of vans like the Ram ProMaster. Quality marine-grade sealants provide long-lasting protection against water intrusion.
Roof Preparation and Cable Routing
The most critical aspect of any roof installation is creating watertight cable penetrations. Start by marking your desired cable entry point, ideally on a relatively flat section of roof with good access from below. Use a step bit to drill the hole, working through the roof material and any insulation layer cleanly.
Once the hole is cut, paint the exposed metal edges to prevent rust formation. This step is crucial for long-term durability, especially in coastal environments or areas with road salt exposure. After the paint dries, install your wire gland using butyl tape as the primary seal between the gland flange and roof surface.
Route your cables through the gland, ensuring adequate slack for roof flex but not so much that water can travel along the cable and into the interior. The Ethernet cable from the Starlink Mini is thicker and less flexible than typical power cables, so plan your routing carefully to avoid sharp bends that could damage the conductors. Investing in quality cable management solutions keeps your installation clean and professional.
Inside the van, route the cables to your electrical distribution area. If you’re installing the Mini low-profile style, you’ll need to connect both the power cable and the Ethernet cable to your network setup. Many van lifers integrate this with their existing 12V electrical system and mobile router for a seamless connectivity experience. This is similar to the electrical systems covered in our guide on campervan solar power setups.
Mounting the Starlink Mini
The actual mounting process begins with preparing the magnetic feet on your chosen bracket. Clean the roof surface thoroughly with alcohol wipes to ensure maximum magnetic adhesion. Position the mount in your predetermined location, checking for adequate clearance from solar panels, vents, and other roof-mounted equipment.
One of the advantages of magnetic mounts is the ability to adjust positioning before making permanent modifications. Take time to test different positions, ensuring the dish has a clear view of the northern sky (in the northern hemisphere) while avoiding interference from other roof-mounted components.
The magnetic feet on quality mounting kits are surprisingly strong, but for permanent installation, many van lifers supplement the magnetic connection with mechanical fasteners. Rivnuts installed around the mount perimeter provide threaded attachment points for screws that lock the mount in place, preventing vibration or wind from shifting the position. This low-profile approach ensures your Starlink Mini sits below solar panels and other roof equipment for optimal aerodynamics.
Electrical Integration and Power Management
The Starlink Mini typically operates on 12V power, making it ideal for van electrical systems. However, power consumption is a consideration, especially when boondocking. The Mini draws approximately 20-40 watts during normal operation, which can add up over 24 hours of use.

For van lifers with substantial solar arrays, this power draw is easily managed. A 1280-watt solar system like the one described in our van build can generate 5+ kilowatt-hours per day, easily covering Starlink usage with plenty of power for other needs. Those with smaller electrical systems may want to use Starlink selectively rather than leaving it on continuously. Proper power monitoring systems help track your energy consumption and optimize battery usage.
Consider installing a dedicated switch for your Starlink power supply, allowing you to turn it off when not needed. Some advanced installations integrate the power control with automation systems that shut down non-essential loads when battery levels drop below a certain threshold. This approach is similar to strategies covered in our article on campervan temperature control and power management.
Performance Expectations and Real-World Use
Starlink Mini performance in van life scenarios has generally exceeded expectations. Users report consistent speeds of 50-150 Mbps in open areas, with some locations achieving even higher throughput during less congested periods. The system maintains connectivity while driving, though obstructions like trees, tunnels, and tall buildings will interrupt service temporarily.
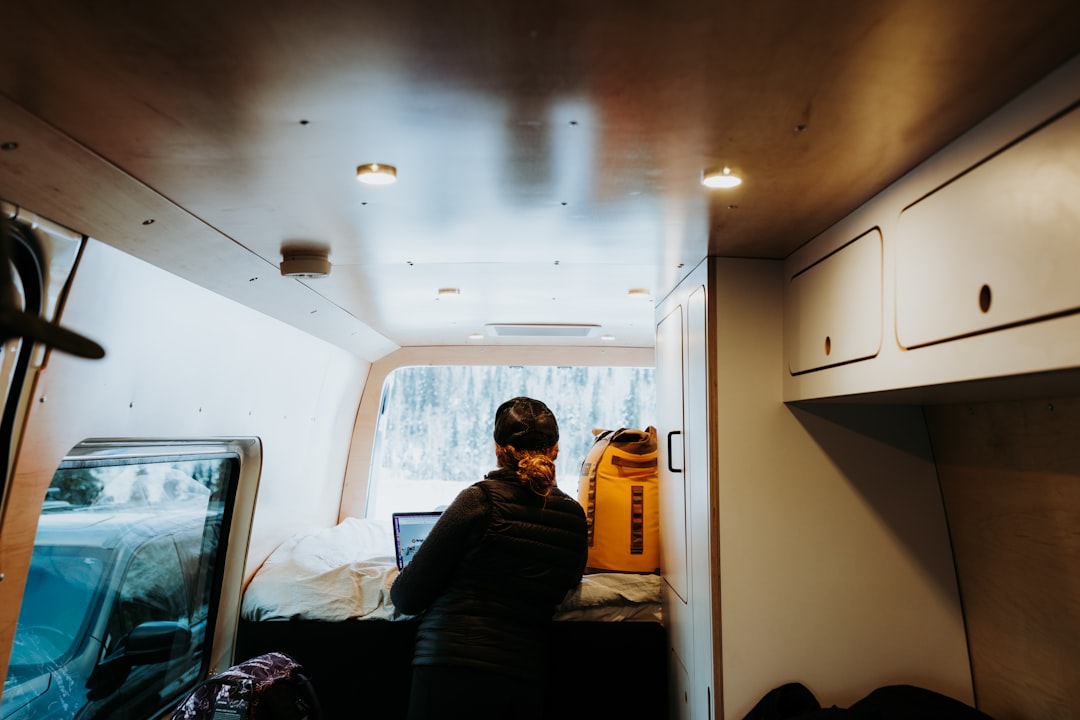
The real magic happens when you wake up in remote locations that traditionally have no cell service. Being able to join video calls, upload large files, or stream high-definition content from a dispersed campsite in national forest land feels almost magical. This connectivity has opened up entirely new possibilities for van lifers who can now work from truly spectacular locations.

The Starlink Mini also serves as a critical safety link for emergency communications. In areas without cell service, the satellite connection provides access to weather information, emergency services, and communication with family or support networks. This peace of mind is invaluable for those traveling extensively off-grid. Combined with a quality travel router with dual-WAN capabilities, you can create a robust connectivity solution that keeps you safe and connected wherever your adventures take you.
Low-Profile Installation Benefits
The trend toward low-profile Starlink Mini installations addresses several practical concerns for van lifers. By positioning the dish below solar panels and minimizing roof protrusion, you reduce wind resistance and noise while driving. The aerodynamic improvement is modest but measurable, potentially improving fuel efficiency slightly over long journeys.
From a stealth perspective, a low-profile installation is less conspicuous when parked in urban areas or locations where overt roof modifications might attract attention. The magnetic mount approach also allows for removal when needed, giving you the flexibility to go completely stealth when the situation calls for it.
Perhaps most importantly, keeping the dish below your solar panels prevents shading of your photovoltaic array. Even partial shading of a single panel can disproportionately reduce solar output, so careful positioning of the Starlink Mini preserves your energy harvesting capability while maintaining connectivity. This is particularly important if you’ve invested in high-efficiency solar panels for your van build.
Alternative Installation Approaches
While permanent low-profile roof mounting is ideal for full-time van lifers, other installation methods may better suit different travel styles. Some van lifers prefer to keep their Starlink completely portable, setting it up on a tripod or magnetic mount outside the van only when needed. This approach preserves roof space and avoids drilling holes but requires setup time at each stop.
Another option is the through-bolt permanent mount that positions the dish slightly higher than low-profile designs. While more conspicuous, these installations may provide better sky access in obstructed areas and are often simpler to install. The choice depends on your priorities—stealth and aerodynamics versus maximum signal access.
For van conversions with roof racks or load bars, clamp-style mounts provide semi-permanent attachment without drilling. These systems work well if you already have structural mounting points and offer the flexibility to reposition the dish as needed. However, they typically sit higher than purpose-built low-profile mounts.
Integrating with Your Van Network
The Starlink Mini works best when integrated into a comprehensive van network strategy. Many van lifers combine satellite internet with cellular boosters and mobile routers for maximum redundancy. When Starlink loses signal under heavy tree cover, your cellular connection can automatically take over via a failover system.
This integration requires some networking knowledge and the right equipment. A quality travel router with dual-WAN capabilities can manage multiple internet sources and distribute connections to all your devices via Wi-Fi. This setup creates a seamless experience where your devices automatically switch between Starlink, boosted cell service, and campground Wi-Fi without manual intervention.
For those working remotely, consider adding a cellular backup plan with substantial data allowance. While Starlink excels in remote areas, urban environments with tall buildings can sometimes challenge satellite reception. Having multiple connectivity options ensures you’re covered regardless of your location.
Maintenance and Troubleshooting
The Starlink Mini requires minimal maintenance, but periodic inspections ensure optimal performance. Check mounting hardware tightness during routine van maintenance intervals, especially after extended travel on rough roads. The magnetic feet can lose some adhesion strength over time, so supplemental mechanical fasteners provide peace of mind.
Cable connections should be inspected for corrosion or loosening, particularly at the dish connection point which experiences constant vibration while driving. The waterproof seals around cable penetrations should be checked annually and reseated with fresh marine sealant if any gaps appear.
Performance issues usually stem from obstructions rather than equipment problems. If you’re experiencing slower speeds or frequent dropouts, check for new tree growth, building construction, or other obstacles that may be blocking your sky view. Sometimes repositioning the van slightly can dramatically improve signal quality.
Cost Considerations and Value Proposition
The Starlink Mini hardware costs approximately $599, with monthly service starting at $50-120 depending on your region and plan. For full-time van lifers or frequent travelers, this investment delivers exceptional value when compared against the cost of campground memberships with reliable Wi-Fi or the limitations of cellular data plans.
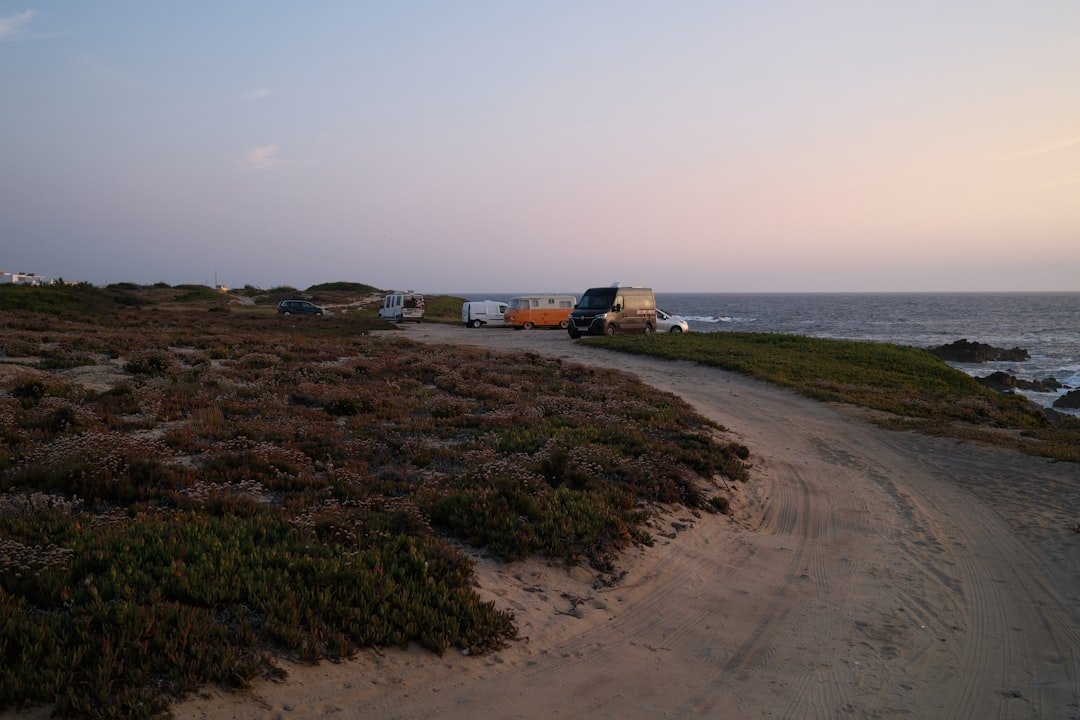
When calculating your return on investment, consider the freedom to camp in dispersed locations without sacrificing connectivity. The ability to work from National Parks, BLM land, or beautiful forest areas while maintaining professional video call quality is priceless for many remote workers. Additionally, having reliable internet for navigation, weather forecasts, and emergency communications provides intangible value that’s difficult to quantify.
Installation costs vary widely depending on your DIY skills and chosen mounting solution. Basic magnetic roof installations can be completed for under $100 in materials, while professional installations with permanent low-profile mounts may exceed $500. For van lifers comfortable with basic tools and wiring, DIY installation is entirely achievable and offers significant cost savings. The necessary tools—like quality drill bits and sealants—are investments that will serve multiple projects throughout your van build.
Future-Proofing Your Van Life Connectivity
Investing in Starlink Mini installation positions your van build for the future of connectivity. As satellite constellations continue expanding and technology improves, early adopters benefit from service enhancements without hardware upgrades. The modular nature of the system means you can reposition or upgrade components as technology evolves.
The trend toward remote work shows no sign of reversing, and van life has become increasingly attractive to digital nomads seeking adventure without sacrificing career opportunities. Your Starlink installation becomes a competitive advantage, enabling you to accept opportunities that require reliable connectivity regardless of your physical location. This connectivity revolution complements other van life considerations like the perfect floorplan design you choose for your build.
For those planning extended international travel, research regional Starlink availability and regulations. While service is expanding globally, some countries restrict satellite internet equipment or require specific licensing. Planning ahead ensures you won’t face connectivity surprises when crossing borders.
Making the Most of Your Connected Van Life
With Starlink Mini installed, the possibilities for van life expand dramatically. You can work from breathtaking locations, stream your favorite shows after a day of hiking, or maintain video calls with family members while exploring remote wilderness areas. The psychological benefit of staying connected shouldn’t be underestimated—many van lifers report reduced isolation and improved mental health when they can maintain relationships and social connections while traveling.
Practical considerations include planning your travel around connectivity needs when possible. Schedule important video calls during times when you’ll have clear sky access, and download critical content during periods of strong connectivity for offline use later. Understanding your Starlink performance patterns helps you make the most of the service.
The community of connected van lifers continues to grow, with many sharing tips, installation photos, and performance data in online forums. Engaging with this community provides valuable insights and helps you optimize your setup based on real-world experiences from others traveling in similar vans or geographic regions.
Is Starlink Mini Right for Your Van Build?
Deciding whether to invest in Starlink Mini depends on your travel style, work requirements, and budget. Full-time van lifers who work remotely will find the investment returns value quickly through access to free camping without sacrificing connectivity. Part-time travelers or weekend warriors may prefer the flexibility of portable setups or relying on cellular service with boosters.
Consider your typical travel destinations and connectivity needs. If you regularly visit areas with poor cellular coverage but need reliable internet, Starlink becomes almost essential. Conversely, if you mostly stay in developed campgrounds with good Wi-Fi or near urban areas with strong cell service, the investment may be harder to justify.
The installation approach should match your van conversion philosophy. Those prioritizing stealth and minimal visual modification will appreciate low-profile permanent installations. Van lifers valuing flexibility might prefer portable setups that can be removed when not needed. There’s no single right answer—the best solution depends on your specific needs and priorities.
Final Thoughts
Installing Starlink Mini in your campervan represents more than just adding internet access—it’s about expanding the possibilities of van life. The freedom to work from anywhere, stay connected with loved ones, and access information in remote locations enhances both the practicality and enjoyment of vehicle-based travel.
As van life continues evolving from a niche lifestyle to a mainstream alternative, reliable connectivity becomes increasingly important. Those who invest in robust internet solutions position themselves to take advantage of location-independent work opportunities while maintaining the freedom to explore on their own terms.
Whether you’re a digital nomad seeking adventure without sacrificing career progression, a retiree wanting to stay connected with family while traveling, or simply someone who values the security of reliable communication in remote areas, Starlink Mini installation deserves serious consideration for your van build. The technology has matured to the point where it’s both accessible and reliable, making it an increasingly standard feature in modern campervan conversions. With the right installation approach and quality components like marine-grade mounting hardware, your Starlink Mini will provide years of reliable service wherever your adventures take you.