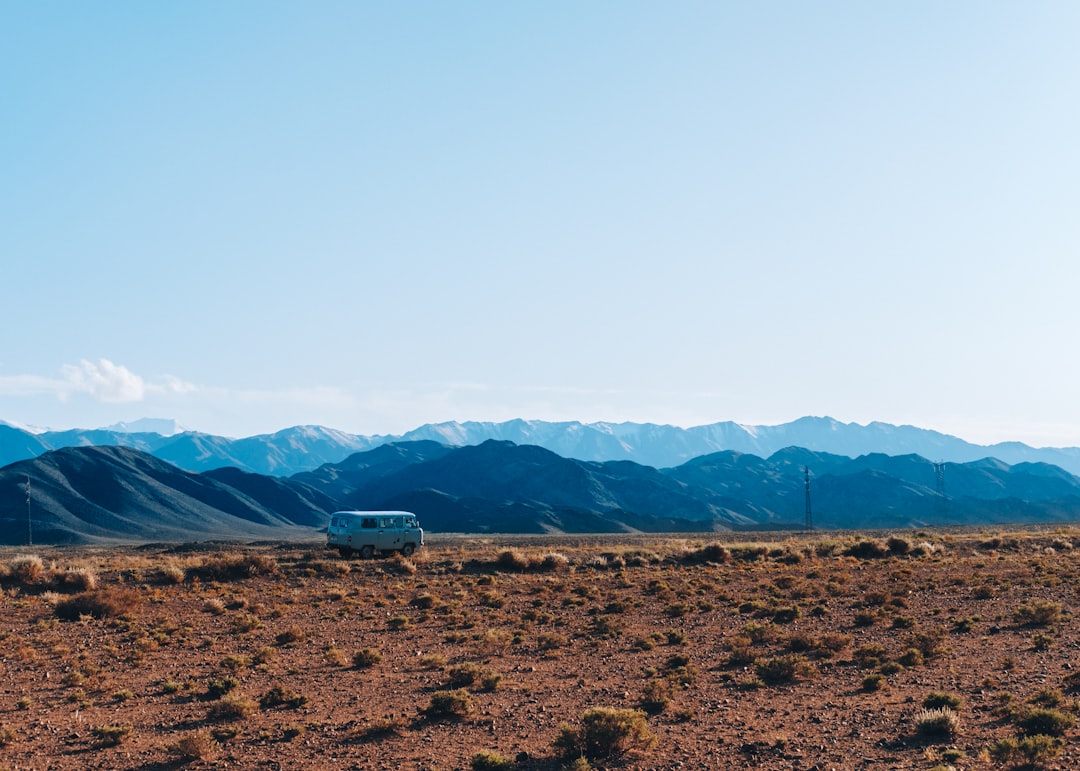
The freedom of waking up wherever you want, surrounded by nature’s beauty—that’s the magic of van life. But transforming a bare cargo van into a comfortable travel-ready home requires thoughtful planning and careful execution, especially when it comes to essential modifications like window installation. Proper windows don’t just provide ventilation and natural light; they connect you to the landscapes you’ve traveled so far to experience, whether it’s waking up to mountain vistas in Colorado or watching waves crash on a California beach.
Whether you’re building out a Ram ProMaster, Ford Transit, or Mercedes Sprinter, the window installation process represents one of the most permanent and impactful modifications you’ll make. Cut too large, and you’re dealing with expensive bodywork. Cut too small, and your windows won’t fit properly. But get it right, and you’ve created a welcoming space that makes every travel destination feel like home.
Why Proper Window Installation Matters for Travel Comfort
Natural light transforms a cramped metal box into an inviting living space. When you’re spending weeks or months on the road, this psychological boost matters more than you might expect. Windows provide cross-ventilation that reduces humidity and prevents that stuffy, closed-in feeling, especially important when cooking or sleeping inside. They also offer those spontaneous moments of connection with your surroundings—a deer grazing at dawn, a storm rolling in over the mountains, or a brilliant sunset that paints the sky in colors you’d miss from inside a windowless cargo van.
Beyond comfort, windows serve practical travel functions. They allow you to assess weather conditions without stepping outside, provide visibility when parking in tight spots, and offer emergency exits if needed. For van lifers who work remotely, a well-placed window can provide the natural lighting essential for video calls and productivity. The difference between a dark, cave-like interior and one filled with morning sunshine can fundamentally shape your daily experience on the road.

Choosing the Right Windows for Your Travel Lifestyle
Not all RV windows are created equal, and your travel style should dictate your choices. Awning-style windows, which push outward from the bottom, are popular for van conversions because they remain open even in light rain—perfect for those impromptu mountain thunderstorms that make the air smell like pine and wet earth. Sliding windows offer simpler operation but require you to close them when the weather turns. Fixed windows might work for rear doors where you primarily want light and views, but you’ll sacrifice ventilation flexibility.
Consider your travel climate too. If you’re chasing warm weather and plan to spend significant time in the Southwest or Florida, tinted windows can reduce solar heat gain and save your portable air conditioner from working overtime. For four-season travelers who venture into snow country, dual-pane windows provide crucial insulation that prevents condensation and keeps your propane furnace from running constantly. Budget-conscious van builders often find quality windows on Amazon, where generic Arctic Tern-style options cost significantly less than name-brand RV windows while offering similar functionality.
The Template Process: Measure Twice, Cut Once
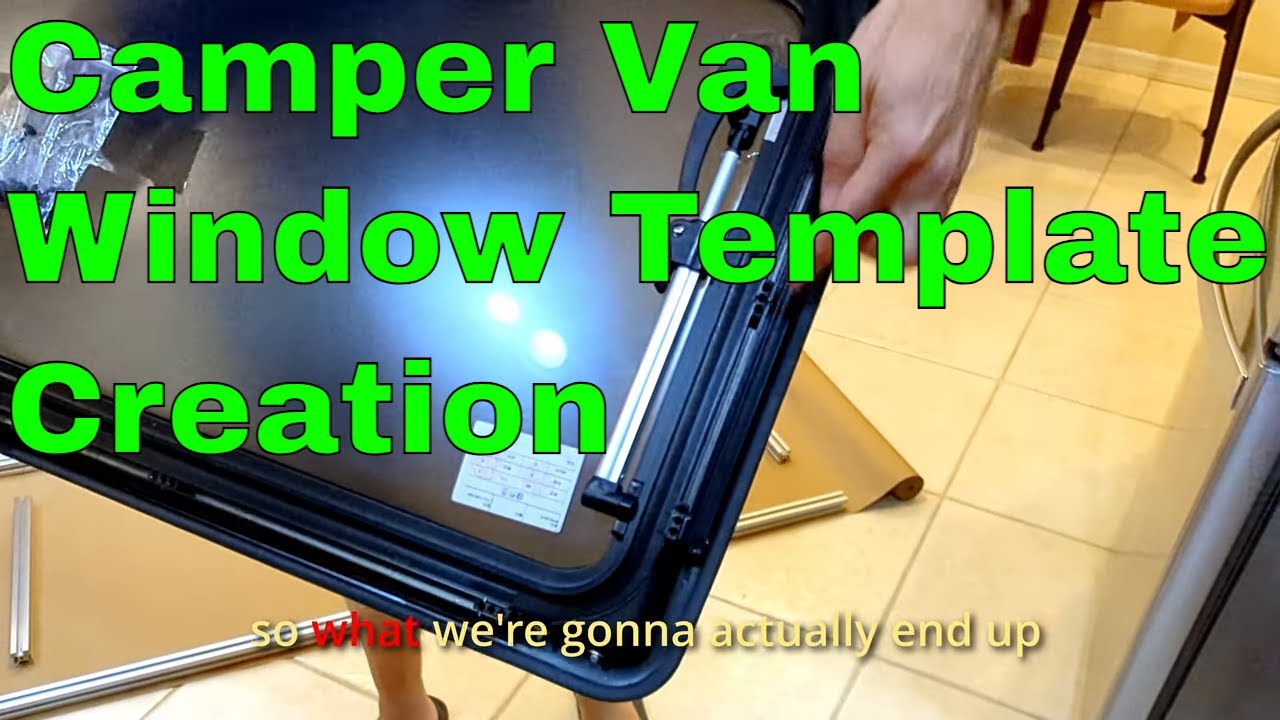
Creating an accurate cutting template represents the most critical step in window installation, especially when working with windows that don’t include manufacturer templates. This phase requires patience and precision, but rushing through it virtually guarantees problems down the road. Start by positioning your window where you want it installed, considering both interior clearance and exterior aesthetics. You’ll want to avoid structural ribs, wheel wells, and existing vehicle features. Mark the window’s outline, then add the required overlap for the window flange—typically half an inch to an inch beyond the visible glass frame.
The real challenge comes in translating interior measurements to exterior cut lines. Professional van builders often create paper templates taped inside the van, drilling pilot holes through the wall to transfer key reference points to the exterior. This method ensures your window ends up exactly where you intended, accounting for wall thickness and any angles in the body panels. For complex curved surfaces on vans like the Ford Transit, you might need to create a flexible template using cardboard or thin wood that can contour to the body shape while maintaining accurate dimensions.
This comprehensive guide demonstrates the template creation process in detail, showing how to work with windows that lack manufacturer templates and illustrating techniques for accurate measurement transfer between interior and exterior surfaces. The video covers common mistakes to avoid and practical solutions for achieving precise cutout dimensions.

Essential Tools for Window Installation Success
Gathering the right tools before you start prevents frustrating mid-project hardware store runs. You’ll need a quality step drill bit for creating clean starter holes in metal body panels, preferably one designed specifically for sheet metal work. A jigsaw with fine-tooth metal cutting blades handles the actual cutting, but consider investing in a high-quality saw—cheap models tend to wander off line and leave rough edges. Tin snips help with any small adjustments or tight corners where your saw can’t reach.
For marking and measuring, pick up a high-quality painter’s tape that won’t leave residue when removed. A good straightedge or level ensures your cut lines are perfectly square, which matters more than you might think—windows that are even slightly crooked create visual annoyance and potential sealing problems. A permanent marker with a fine tip gives you clear lines that won’t rub off during cutting, and having a few different colored markers helps distinguish between cut lines, reference marks, and measurements.
Don’t forget safety equipment. Metal cutting creates sharp shards and fine particles that you don’t want in your eyes or lungs. Quality safety glasses, heavy-duty work gloves, and a respirator mask are non-negotiable. Consider ear protection too—cutting through vehicle body panels with a jigsaw produces surprisingly loud noise that can damage your hearing during extended cutting sessions.

Preparing Your Van for Window Installation
Before you ever put blade to metal, thorough preparation prevents costly mistakes. Start by removing any interior panels or trim that might be in the way. This often means taking out interior wall coverings, insulation, and sometimes even structural supports like cross braces that run behind your intended window location. Use a flashlight and inspection mirror to check for hidden wiring, plumbing lines, or structural ribs that might not be visible from a casual glance. Finding these obstacles after you’ve started cutting creates expensive complications.
Next, thoroughly clean both the interior and exterior surfaces around your planned cut location. Any dirt, grease, or road grime can interfere with your template transfer or cause your tape to come loose mid-cut. For vans with existing factory insulation, you’ll need to remove or cut back the sound-deadening material in the immediate area. This Thinsulate or similar material can be trimmed back and replaced around the window flange later, but it needs to be out of the way during the cutting process.
If you’re working with a newer van, consider applying protective film or masking paper to surrounding areas to prevent accidental scratches from your tools or falling metal debris. Professional installers often use magnetic tool trays to keep hardware and cutting tools organized and prevent them from rolling off the vehicle during the installation process.
The Cutting Process: Precision and Patience
When you’re ready to begin cutting, start by drilling pilot holes at each corner of your marked cutout using a smaller drill bit than your final cut width. These holes serve two purposes: they give your jigsaw blade a starting point, and they create rounded corners that reduce stress concentrations in the metal. Some builders prefer using a step bit to gradually enlarge these corner holes to the final cut width, which creates cleaner edges than trying to cut perfect corners with a jigsaw.
Begin cutting along your marked lines, moving slowly and letting the saw do the work. Forcing the blade causes it to wander off line and creates rougher edges. Most experienced van builders recommend cutting about 80% of the perimeter and leaving small tabs at strategic points. These tabs hold the cutout piece in place, preventing it from suddenly falling and potentially damaging your vehicle’s paint or causing injury. Once most of the cutting is complete, you can support the cutout piece with one hand while making the final cuts through the remaining tabs.
Immediately after cutting, you’ll need to address the raw metal edges to prevent rust formation. Vehicle body panels are typically coated or painted, but cutting exposes bare metal that will rust quickly if left untreated. Use a wire brush or sandpaper to clean any burrs from the cut edges, then apply a rust-inhibitive primer or paint specifically designed for metal surfaces. This step is especially crucial for coastal travelers or anyone who plans to spend time in humid climates where rust can quickly compromise your installation.
Installing and Sealing Your Windows
With the hole cut and prepped, test-fit your window before applying any sealants. This dry run reveals any problems with the cutout size or shape while you still have opportunity to make minor adjustments. The window should fit snugly without forcing, but there should be enough clearance for the mounting flanges to sit flat against the vehicle body. If you find tight spots, mark them carefully and remove small amounts of material with a file or sandpaper—avoid the temptation to cut larger sections, which can create gaps that are difficult to seal properly.
Sealing is arguably the most critical aspect of window installation. Water intrusion can cause extensive damage to your van’s interior, electrical systems, and insulation. Professional installers typically use butyl tape as the primary sealant because it remains flexible over time and doesn’t harden or crack like some silicone products. Apply the butyl tape to the window flange, following the manufacturer’s recommended thickness and pattern. Some builders recommend warming the butyl tape slightly before application—it becomes more pliable and adheres better in cooler temperatures.
Once the sealant is applied, carefully position the window and press it firmly into place. Start securing the mounting screws, but don’t fully tighten any single screw before you’ve started the others. Instead, work your way around the window gradually, tightening each screw a little at a time in a star pattern. This technique ensures even pressure distribution and prevents the window frame from warping or pulling away from the sealant in certain areas. After all screws are snug, check that the window operates smoothly—opens, closes, and locks properly—before making final torque adjustments.
The final sealing step involves applying exterior-grade lap sealant over the screw heads and around the window perimeter where the flange meets the vehicle body. This self-leveling sealant creates a waterproof barrier that channels water away from potential entry points. Choose a product specifically designed for RV use, as it’s formulated to withstand UV exposure, temperature extremes, and the vibration that occurs during vehicle travel.
Interior Finishing and Integration
With the window securely installed and sealed, turn your attention to the interior finish work. The gap between the window frame and your interior wall covering needs careful treatment to prevent drafts and moisture intrusion while maintaining a clean aesthetic. Many van builders use automotive-style trim rings or create custom wood trim pieces that conceal the raw edges of the wall cutout. These trim pieces can be painted to match your interior or stained for a natural wood look that adds warmth to the space.
If your van has insulation, you’ll need to reinstall or replace the insulation around the window opening. Compressed foam insulation strips or spray foam can fill irregular gaps, but be careful not to use expanding foam products that could exert pressure on your window frame and affect the seal. For vans with Thinsulate or similar recycled fiber insulation, carefully trim the material to fit around the window flange and secure it with automotive-grade adhesive or mechanical fasteners.
Consider how your new windows integrate with your overall electrical system too. If you’re installing powered vents or fans, now is the time to run wiring before you finalize interior trim work. Solar panel installations often require planning for cable routing, and windows can provide convenient pass-through points for wiring runs to the roof. Some van builders even install small switches near windows for LED lighting controls, creating convenient illumination for nighttime reading or navigation without needing to cross the dark van interior.
Common Mistakes to Avoid
Even experienced DIY enthusiasts can fall prey to common window installation pitfalls. One of the most frequent mistakes involves cutting holes that are slightly too large, often because measurements didn’t account for the required overlap for window flanges. Unfortunately, there’s no easy fix for this problem—you can’t add metal back once it’s been cut, and filling gaps requires extensive bodywork that often looks professional only when done by auto body specialists.
Another common error involves inadequate sealing, particularly around mounting screws. Many builders focus on sealing the perimeter but neglect the screw holes themselves, which can become primary entry points for water. Each screw should have its own small dab of sealant, and the exterior lap sealant should completely cover the screw heads. This attention to detail makes the difference between windows that stay watertight for years and those that develop leaks after the first heavy rainstorm.
Placement errors also plague first-time van builders. Windows positioned too close to structural ribs or wheel wells may interfere with interior cabinetry or bed platforms. Others install windows too low to the floor, creating privacy issues and potential breakage problems when parked in public spaces. Before cutting, always consider how the window placement affects your overall floorplan, including where your bed, kitchen, and seating areas will be located.

Enhancing Your Travel Experience Through Thoughtful Design
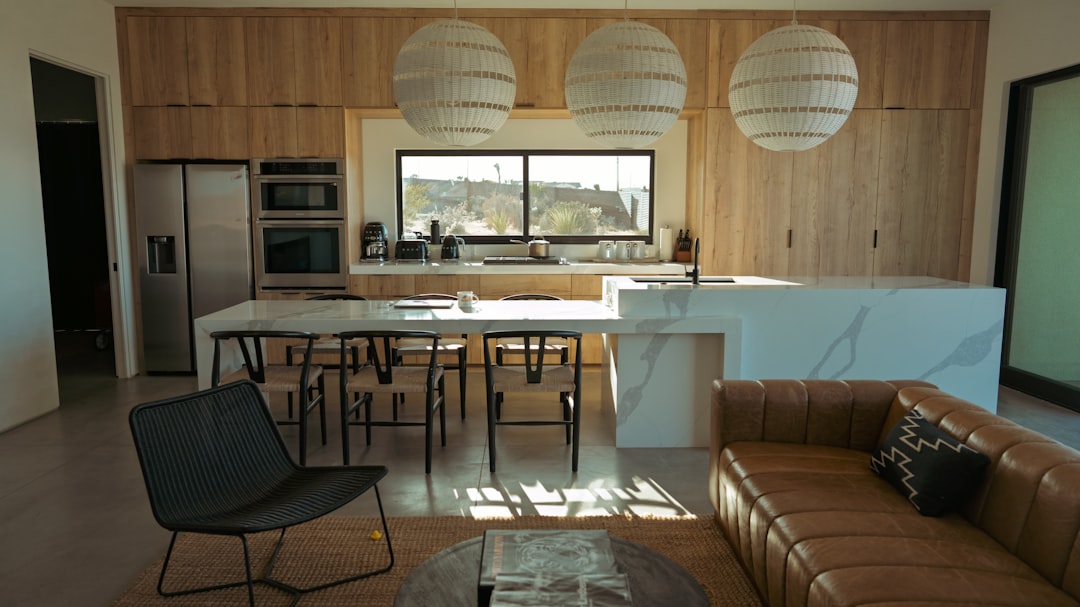
The windows you install today will shape your van life experience for years to come, influencing everything from your daily comfort to your travel photography opportunities. Take time to consider how window placement affects your living space functionality. Kitchen windows positioned near your stove provide ventilation while cooking and let you enjoy scenic views during meal prep. Bedroom windows that face east greet you with morning light, helping establish healthy sleep cycles especially during extended travel across time zones.
Think about your photography habits too. Van lifers who document their travels through video or photography might prioritize windows that frame specific types of scenery—coastal drives, mountain passes, or desert landscapes. The difference between capturing a stunning sunrise through a thoughtfully positioned window and missing it because your windows face the wrong direction can significantly impact how you remember and share your travel experiences.
Consider privacy as well, especially if you plan to travel in urban areas or popular camping destinations. While you want natural light and views, you also need the ability to create privacy when needed. Quality window coverings serve dual purposes: providing privacy when you’re parked in public spaces and reducing heat gain during hot summer days. Many van builders opt for thermal window covers that can be easily removed during pleasant weather, giving you flexibility based on conditions and privacy needs.
Planning Your Van Build Timeline
Window installation represents one of the earlier phases in a van build, typically happening after insulation and before interior wall coverings. This sequence makes practical sense—you need access to bare walls for cutting and sealing, but windows should be in place before you build cabinets or bed platforms that might make installation more difficult. Plan your build timeline to account for the possibility of delays, especially if you’re ordering custom windows that might have extended lead times.
Weather also affects installation timing. Cutting large holes in your van creates obvious challenges during rainy or snowy conditions. Most builders schedule window work for dry weather windows, using portable shelters or working indoors when possible. If you’re building in a climate with frequent precipitation, consider having tarps and emergency coverings ready in case weather changes mid-installation. A wet interior can delay other phases of your build and create moisture problems that persist long after the windows are installed.
Investment Considerations for Your Van Build
Quality windows represent a significant investment in your van build, typically costing several hundred dollars per opening depending on size and features. While it’s tempting to cut costs here, remember that windows affect your daily comfort, safety, and the overall quality of your van life experience. Cheap windows may save money upfront but often develop problems with seals, hardware, or insulation that require expensive repairs or replacements down the road.
Budget for not just the windows themselves but also the necessary installation supplies. Quality sealants, cutting tools, safety equipment, and finishing materials add up quickly. Many van builders recommend setting aside 20-30% above your estimated window costs to account for these supplies and unexpected needs. It’s also worth investing in diagnostic tools like multimeters if your installation involves electrical components for powered vents or fans.
The Payoff: Creating Your Perfect Travel Home
When properly executed, window installation transforms your van from a cargo hauler into a comfortable travel-ready home. There’s profound satisfaction in waking up on your first converted van trip, opening your windows to let in the morning air, and realizing that you created this mobile living space with your own hands. Each properly installed window becomes a frame for your travel adventures—the Rockies outside your bedroom window, Pacific sunsets through your kitchen window, or forest views while you work at your van office.
The investment in careful planning, precise cutting, and thorough sealing pays dividends every day you spend on the road. Your van becomes more than just transportation; it becomes the base camp for your explorations, the witness to your journey, and the constant companion as you explore new destinations. Whether you’re parked on BLM land in the Southwest, nestled in a forest campground in the Pacific Northwest, or waking up to ocean waves on the coast, your thoughtfully installed windows connect you to the landscapes that make van life so transformative.
The journey from bare cargo van to fully equipped travel home takes patience, skill, and careful planning. Window installation represents one of the most technically challenging but ultimately rewarding phases of this transformation. Get it right, and you’ve created not just a vehicle modification but a fundamental improvement to your travel lifestyle. Every sunrise you watch through your own-installed windows, every cross-breeze that cools your van on a hot summer night, every moment of connection with the beautiful places you’ve worked so hard to visit—these are the rewards of thoughtful van conversion work, and they make every careful measurement, every precise cut, and every thorough seal completely worth the effort.
3 thoughts on “Campervan Window Installation: Essential Van Life Conversion for Comfortable Travel”