When most people think about campervan conversions, they picture the exciting stuff: the layout design, the solar panels, the kitchen setup. But there’s a step that happens before any of that takes shape, and skipping it means living with cold feet, uneven surfaces, and a van that fights you every time the temperature drops. Floor insulation and leveling might not be the most glamorous part of a build, but it’s the foundation—literally—of a comfortable van life experience.
Cargo vans come from the factory with ribbed metal floors designed for hauling equipment, not for living in. Those ribs create air gaps, thermal bridges, and an uneven surface that makes installing cabinets, beds, and flooring a real headache. Getting this layer right means the difference between a van that feels like home and one that never quite shakes its commercial vehicle origins.
Why Van Floor Insulation Actually Matters
The metal floor of a cargo van is essentially a giant heat sink. In summer, it absorbs radiant heat from the road and turns your living space into an oven. In winter, cold air moves through those floor ribs and pulls warmth right out of the cabin. This isn’t a small effect, either. Without insulation, you’ll burn through propane trying to stay warm or drain your batteries running fans and air conditioning constantly.
Sound damping is another major benefit that people often overlook. Road noise travels straight through uninsulated metal, and on long highway stretches, that drone gets exhausting. A properly insulated floor pairs well with sound deadening materials on the walls to create a genuinely quiet living space.
There’s also the condensation factor. When warm interior air meets a cold metal floor, moisture forms underneath your flooring where you can’t see it. Over time, that hidden moisture leads to mold, rust, and damage to whatever subfloor you’ve installed. Insulation creates a thermal break that prevents this from happening in the first place.

Understanding Your Van’s Floor Ribs
Every cargo van has a slightly different floor profile, but the concept is the same across Ram ProMaster, Ford Transit, and Mercedes Sprinter models. The floor consists of raised ribs that run the length of the cargo area, creating channels between them. These ribs provide structural strength but leave deep valleys that need to be addressed before you lay down any kind of flooring.
On a Ram ProMaster, the rib depth varies between approximately 2 inches at the bottom of the channel and 2.5 inches at the peak. The channels aren’t perfectly uniform either. The curves transition inconsistently, which means you can’t just cut a single template and expect it to work everywhere. Each section needs to be measured and fitted individually.
This is where many first-time builders get frustrated. They buy insulation, start cutting, and quickly realize that nothing sits flat. The solution is to treat the ribs as a leveling project first and an insulation project second. You’re creating a flat, thermally broken surface that serves as the base for everything above it.

Choosing the Right Insulation Material
Not all insulation works well for van floors, and this is a decision worth getting right since you’ll be walking on it every day. The most popular options each have trade-offs worth understanding before you commit.
Minicell Foam
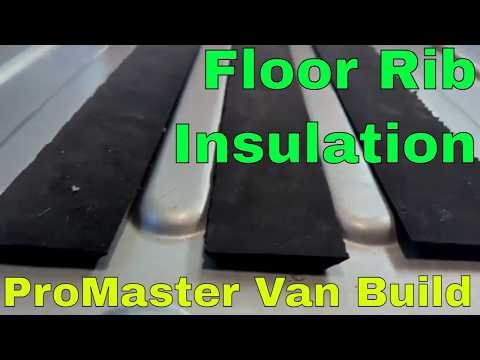
Minicell foam, also called crosslinked polyethylene foam, has become a go-to choice for van floor insulation, and for good reason. It’s closed-cell, meaning it won’t absorb moisture, it compresses slightly under weight to create a cushioned feel, and it’s easy to cut with a basic utility knife. A 2-pound density at roughly 0.375 inches thick fills the ProMaster floor channels nicely, though 0.25 inch is also workable if your ribs aren’t as deep.
The key advantage of minicell is how forgiving it is during installation. Unlike rigid foam boards that crack or crumble when you need to trim them, minicell can be scored lightly and then cut clean through on the second pass. Small gaps don’t matter as much because the material compresses to fill them when you install your subfloor on top. You can find minicell foam sheets in various thicknesses to match your specific van’s floor profile.
Rigid Foam Board
XPS (extruded polystyrene) and polyiso boards offer higher R-values per inch than minicell foam, making them attractive for builders trying to maximize thermal performance. They’re also perfectly flat, which helps with the leveling goal. The downside is that rigid boards don’t conform to the curved surfaces in floor channels without extensive cutting, and any gap becomes a thermal bridge that undermines the whole installation.
If you go with rigid board, plan on spending considerably more time measuring and cutting. A contour gauge becomes essential for transferring the rib profiles onto your insulation material accurately.
Reflective Insulation
Products like Reflectix are popular in the van life community, but they’re better suited for walls and ceilings than floors. Reflective insulation works by reflecting radiant heat, but it requires an air gap to function effectively. In a floor application where everything gets compressed under weight, there’s no air gap, and the reflective properties become essentially useless. Save this stuff for your walls and ceiling cavities instead.
The Measuring and Cutting Process
Precision matters here more than speed. Every piece of insulation that fits poorly in a floor channel leaves an air gap, and those gaps add up to cold spots that you’ll feel through your flooring on winter mornings. The good news is that once you develop a system, the process moves faster than you’d expect.
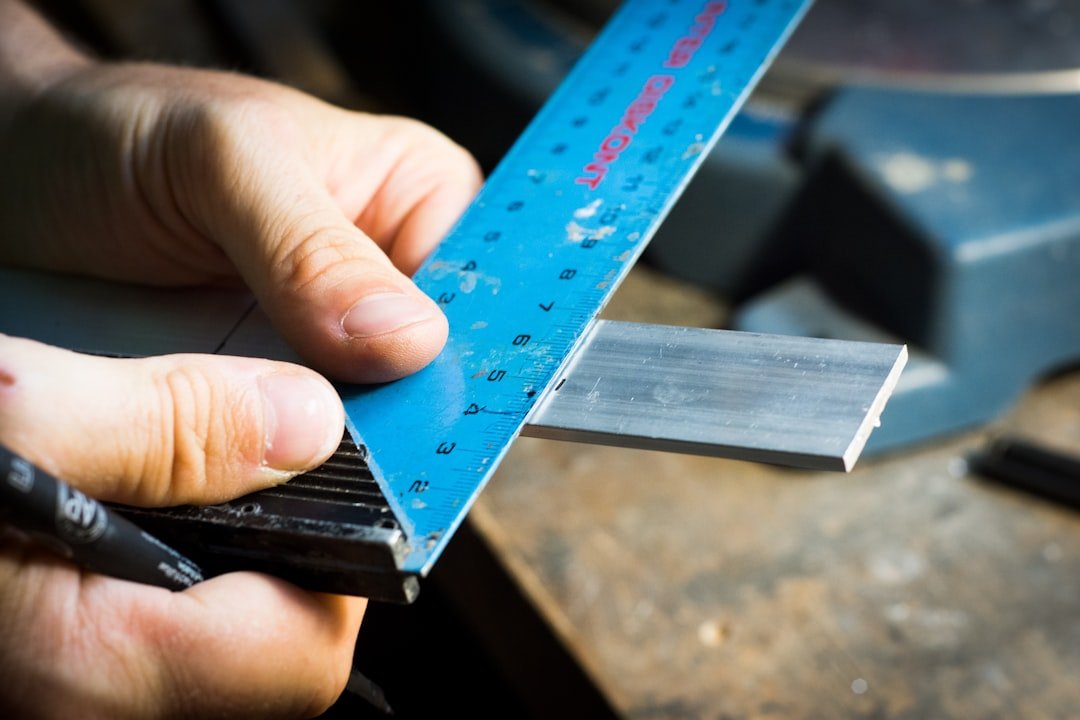
Start with a contour gauge pressed into each channel to capture the exact profile. The ribs on most vans aren’t perfectly rectangular—they have curved edges that transition from the channel floor to the rib peak. Press the gauge firmly, lock it, then trace that profile onto your foam material. You’ll notice the profile changes slightly depending on where you are in the van, so take measurements at multiple points along each channel.
For cutting, use a thin-bladed knife rather than a thick one. A thin blade creates cleaner edges and compresses the foam less, which means a more accurate fit. Score the cut line lightly on the first pass, then go deeper on the second. Trying to cut through thick foam in a single pass almost always results in jagged edges that don’t fit properly. A quality sharp utility knife with fresh blades makes a surprising difference in the quality of your cuts. And if you’re fitting pieces into tight channels, a rigid foam board alongside your flexible material gives you options for different sections.
One trick that saves material: alternate the direction of your traced pieces on the foam sheet. If you’re cutting trapezoidal wedges, flipping every other one means you waste far less material between cuts. Running a straight edge along the foam as a guide keeps your cuts consistent.

Should You Fill Every Channel?
This is a question that divides the van building community. Some builders argue that leaving the channels empty allows any water that gets into the floor cavity—whether from a spill, a leak, or condensation—to drain toward the edges rather than pooling against the metal. Others prioritize the thermal benefit of filling every gap with insulation.
The reality depends on your travel style. If you’re planning to spend significant time in cold climates where floor temperature really matters, filling the channels provides a noticeable improvement in comfort. The insulation creates a thermal break between the cold metal and your living space that you simply can’t achieve any other way. For builders heading to cold weather destinations year-round, every bit of thermal protection counts.
If you’re mostly staying in warm climates, the case for filling every channel is weaker. The thermal benefit is smaller, and the drainage argument carries more weight. A middle-ground approach that many experienced builders use is to insulate the main living area channels but leave the rear garage area uninsulated for drainage.

Building Up the Layers Above the Ribs
Once the channels are filled, you still need to address the rib peaks themselves. The goal is a completely flat surface across the entire floor, which means adding layers on top of the ribs to bring everything level with the filled channels. This is where many builds go wrong by adding too much height and eating into headroom.
A common approach uses a combination of thin closed-cell foam or rigid insulation over the entire floor, followed by a plywood or HDPE subfloor. The total added height from insulation through subfloor typically runs between 1 and 2 inches, which is manageable in most vans. Going thicker than that starts to eat into your standing room and makes the van feel cramped.
For the subfloor itself, marine-grade plywood at half-inch thickness is the traditional choice. It’s strong, relatively light, and resistant to moisture. Some builders are switching to HDPE (high-density polyethylene) sheets, which are completely waterproof and won’t rot, but they’re more expensive and can be slippery unless you add texture or a floor covering on top. Either way, make sure to use quality subfloor material since it bears the weight of everything in your van. Many builders also add a reflective insulation layer between the foam and subfloor for an extra thermal break.
Common Mistakes and How to Avoid Them
The single biggest mistake in van floor insulation is rushing the measuring process. Impatience leads to gaps, and gaps lead to cold spots that bother you for as long as you own the van. Take the time to measure each channel individually, cut carefully, and test-fit every piece before moving on.
Another frequent error is using too-thick insulation and then forcing the subfloor down on top of it. Compressed insulation loses much of its R-value, so you end up with a higher floor and less insulation performance than if you’d used the right thickness from the start. The insulation should sit slightly below or flush with the rib peaks, never above them.
Finally, don’t skip the vapor barrier. Even with closed-cell insulation that won’t absorb moisture, a vapor barrier between your insulation and subfloor prevents condensation from forming in the boundary layer. A simple layer of heavy-duty polyethylene sheeting, seams taped with foil tape, goes a long way toward protecting your floor investment.

The Payoff: Comfort on the Road
After spending the time to properly insulate and level your van floor, the difference is immediately noticeable. The van stays warmer in cold weather and cooler in hot weather. Road noise drops significantly. Your flooring sits flat and even, which makes installing cabinets and furniture straightforward rather than a constant battle against uneven surfaces.
Perhaps most importantly, you eliminate those mysterious cold spots that plague so many van conversions. There’s nothing quite like waking up on a freezing morning in a van where the floor is actually warm under your feet because you took the time to insulate it properly. It’s one of those build decisions that pays dividends every single day you spend in the van.
For anyone planning a full campervan build, floor insulation should be one of the very first steps after sound deadening. It sets the stage for everything that comes after, and getting it right means the rest of your build goes smoother. The materials are affordable, the tools are basic, and the process is straightforward if you take your time with measurements and cuts.

Materials Checklist for a Van Floor Insulation Project
Before starting, gather everything you need so you’re not making hardware store runs mid-project. Here’s what a complete floor insulation job typically requires:
- Insulation material — Minicell foam (0.25 or 0.375 inch) or rigid foam board cut to fit your floor channels
- Contour gauge — For transferring rib profiles to your insulation material
- Sharp utility knife — With plenty of replacement blades for clean cuts
- Straight edge — A metal ruler or piece of 80/20 aluminum extrusion works well as a cutting guide
- Measuring tape and marker — For layout and marking cut lines on the foam
- Vapor barrier — Heavy-duty polyethylene sheeting to cover the entire floor area
- Foil tape — For sealing vapor barrier seams
- Subfloor material — Marine-grade plywood or HDPE sheet in your chosen thickness
The entire project can be completed in a weekend for most van models, and the cost is surprisingly reasonable. Most of the expense comes down to the insulation material and subfloor, with everything else being basic shop supplies. Compared to the cost of the van itself and all the other components in a conversion, proper floor insulation is one of the highest-value investments you can make in your build.
Whether you’re building out a weekend warrior or a full-time home on wheels, don’t underestimate what a well-insulated floor does for your quality of life on the road. It’s hidden work that nobody sees, but you’ll feel the difference every single day.