
The best shower I have ever taken on the road was not the hottest or the longest. It was the one that happened at all. A cold night on public land, red dust in every crease, and nothing within an hour but a gas station with an “out of order” sign on the restroom. Being able to rinse off inside the van, then sleep clean, did more for that trip than any view.
The catch, in a small van, is space. A permanent shower stall eats a closet’s worth of floor, blocks the path to the cab, and turns every layout sketch into a fight. So for this build, my crew and I went the other direction: a shower that sets up when we need it and folds back into a drawer when we do not. What actually lives inside the van is completely removable.
Why a Fold-Away Shower Fits the Way We Travel
Most of our trips are long weekends and two-week loops rather than full-time living. That changes the math. A dedicated wet bath makes sense if you shower in the van every single day for a year. For us, it would be a lot of square footage spent on something we use a few times a week, mostly on stretches of dispersed camping between towns.
A fold-away setup flips that trade. On normal days the floor is open, the side door is clear, and the van feels like a living room. On shower nights, the base comes out of a drawer, the curtain goes up, and five minutes later there is a functioning wet zone right inside the side door. When the shower is done, it all drains, dries, and disappears.
The other quiet benefit is that nothing is permanent. If a part fails or the layout feels wrong, we change it without tearing out cabinetry.
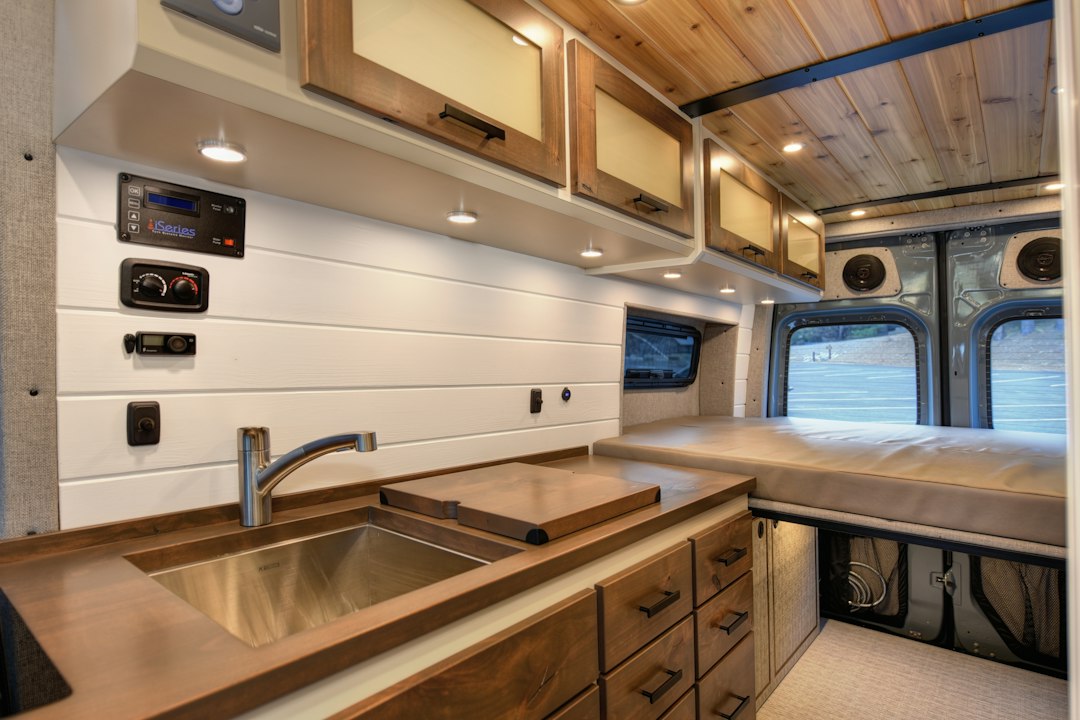
The Base: A Folding Bathtub Doing a Shower Pan’s Job
The heart of the system is a collapsible folding bathtub used as a shower base. Sold as portable soaking tubs, they offer exactly what a van needs: firm walls when open, a flat stack when closed, and a drain in the floor of the tub. Folded up, ours drops into a drawer. Opened, it gives us a raised perimeter that keeps water in one place.
We set ours just inside the side door. On the first dry fit, what mattered was the space it left. With the tub open, there is still a walkway down the side, so you can get past it, reach the cab, and exit the front door if you need to. That means we can leave the shower set up while the rest of the van is in use, which is a big deal on cold or rainy nights when everyone is inside at once.
Our compact toilet sits right beside that shower footprint. In practical terms, the bathroom is still available while someone is showering. It is not glamorous, but in a van you call it like it is and design for how people actually live. If you are still deciding on that side of the setup, I wrote about the waterless toilet that changed how I travel off-grid, and the two systems play well together in a tight layout.
Placement has one more constraint: the tub’s drain has to line up with a drain hole in the van floor. That hole leads down to the grey tank under the van, which is the part of the plumbing that took real work. The full story of cutting through the floor and plumbing a closed grey system is in the floor drain that turned my van into a real off-grid shower. This piece is about everything above that floor.
The Drain Fitting That Made It All Work
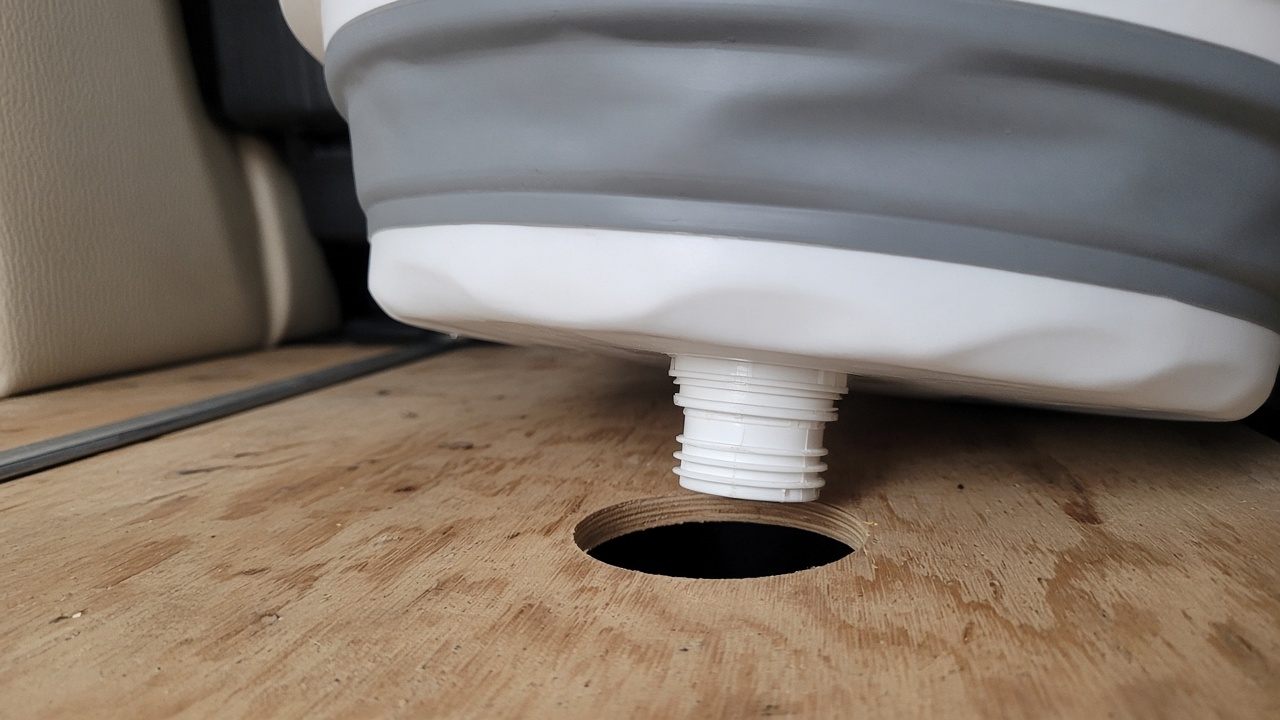
Out of the box, the folding tub’s drain has a short plastic stub that pokes down maybe an inch below the floor of the tub. That works fine in a backyard. It did not work for us, because we needed the tub to seat into the floor drain and send every drop down to the tank instead of puddling on the van floor around it.
The fix came from the plumbing aisle. A bathtub through-wall fitting, the kind of bushing designed to pass through the side of a plastic tub or tank, turned out to fit almost perfectly once its rubber gasket was removed. The stock drain on the bottom of the tub is just a little smaller than the inside of the bushing, so the fitting slides over it and sits snug.
To make it permanent, we bonded the fitting to the bottom of the tub with Goop marine contact adhesive. Once it cured, the joint was solid enough that I could lift the entire tub by the fitting. The inside of that bushing is threaded for half-inch NPT, so a short half-inch NPT extension threads in and drops a couple of inches below the bottom of the tub. That extension is the plug that sets down into the floor drain.
If you try something similar, take a few minutes before you glue. Dry fit the pieces, mark the orientation, and make sure the extension lands centered over your floor drain when the tub is in its final spot. A wrap of PTFE thread seal tape on the extension threads costs pennies and saves you from chasing a slow drip later.
Setting Up on Shower Night
The routine is short, which is the whole point. First, the cover comes off the floor drain. In the finished van, that drain will sit under a final layer of flooring with an access cover, so on ordinary days you would never know it is there. Then the folded tub comes out of its drawer, opens up, and the extension under the drain drops into the hole in the floor.
The very first time we tried it, the extension seated firmly. I will be honest about what we still do not know: how well it stays put over months of driving and setup, and how completely the tub empties on its own when the van is not perfectly level. For now, it sits solid and the water goes where it should.
The shower curtain comes next. The long-term plan is a curtain that hangs from the ceiling and drops down inside the perimeter of the tub, so water running down the curtain lands in the base instead of on the floor. For the first version, we are hanging it from the 80/20 aluminum framing in the van and wrapping it around the tub. A clear PEVA shower curtain liner is a smart choice in a van: it lets the overhead light through, so you are not showering in a cave, and it wipes dry fast.
One last check before the water goes on: close any valve you do not want water escaping through. Two seconds, no surprise puddles.
Borrowing Water From the Galley Sink
This is the part I like most. There is no separate shower plumbing inside the van. The galley sink already has water, a pump, and a faucet, so the shower simply borrows them. A diverter at the sink lets you flip the flow from the spout to a hose, and that hose runs up and over the top of the curtain to a shower head hung somewhere overhead.
We use a faucet diverter kit on our sink, and once the aerator was back on, the flow was strong and very acceptable for a small 12-volt system. The pump is quiet. When you turn the faucet off, it shuts down quickly, and a few seconds of dripping afterward is normal.
The sink itself has its own backstory. Ours is a secondhand unit we refreshed before it went in, which I covered in giving a secondhand van sink a second life before the road. Put the sink close to the shower footprint; a short hose run is easier to manage.

There is one small piece of insurance on our diverter that I would recommend to anyone. A stainless steel faucet cap covers the hose outlet when the shower is not connected. If someone flips the diverter the wrong way while doing dishes, the cap keeps water from shooting out across the galley.
Hot Water Is a Separate Problem
The diverter only moves water. Whether that water is warm depends on the rest of the system. We warm our tank two ways: engine coolant while we drive, explained in how my van’s engine heats six gallons of shower water by sundown, and a timed electric circuit for parked days, covered in why I put my campervan water heater on a timer. A fold-away base is only half a shower without one of those in place.
The Leak Test That Sent Us Back to the Parts Bin
Our first wet test used an old shower head and hose we had carried around for years. With the diverter set to the sink spout, water drained down exactly as expected. Then we flipped it to the shower, and the leaks started. A little at first, then a lot, from the connection near the diverter and again at the head. You could not use it. The old unit leaked whenever it was turned on or off, and in a van, a leak at the top of a hose turns into a puddle at the bottom of a cabinet.
That is exactly why you wet test in the driveway, not on the first night of a trip. Bring a towel, a flashlight, and a phone camera, and watch every joint while the water runs and right after it stops. Our build photos came from an older Google Pixel, but the Google Pixel 11 Pro is the better choice now if you want sharp close-ups of fittings in dim cabinets.
The replacement was an RV shower head with hose and five spray modes. It came with a holder for the head, a hose clamp, and a small roll of thread tape, plus a pair of adapters on the hose ends that we removed for our connection. Installed, it delivered a good stream, shut off nearly completely with barely any drip, and the face twists to change the pattern, from a tight center spray to wider coverage. Most importantly: no leaks.
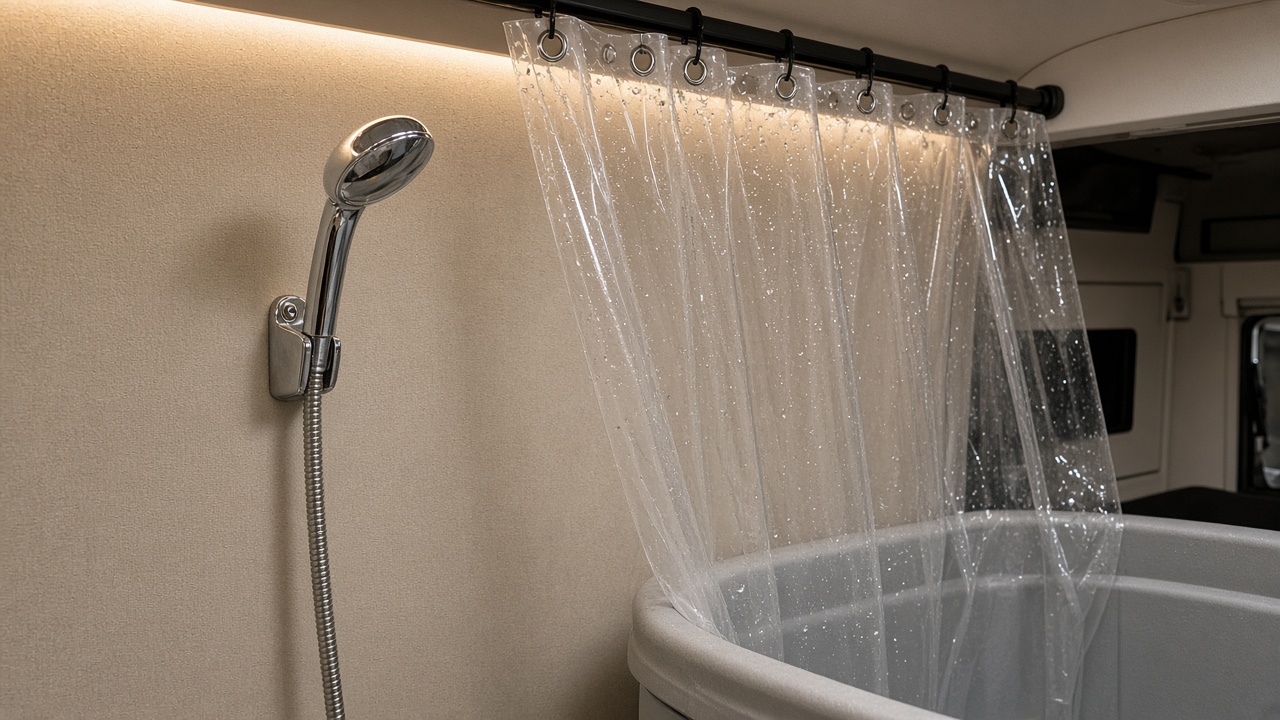
Hose Length and Where the Hose Goes
The new hose is long enough to reach a mount overhead, but not so long that it tangles. The trade-off is that if the hose runs up and over the curtain, you cannot bring the head all the way down to rinse your feet or the bottom of the tub. Our next tweak is likely to pass the hose through the curtain at shoulder height instead of looping it over the top. That would let the head come off its holder and reach down low without pulling the curtain out of the tub.
What a Van Shower Is Really Like
Let me set expectations. This is not the Ritz-Carlton. You stand in a compact tub, under a curtain, a step from the side door. Navy showers are the rule: wet down, water off, soap up, rinse. With a modest fresh-water tank and a grey tank waiting below, every minute of running water matters.
A few things make it feel a lot less like camping and a lot more like home:
- A towel that dries overnight. A quick-dry microfiber camping towel packs small and is usually ready again by morning, even hung inside on a cool night.
- Gentle soap. Even with a closed grey tank, a biodegradable camp soap is kinder to the tank, to the dump station, and to the occasional rinse you do outdoors.
- Ventilation. Crack a window or run the fan for a few minutes after the shower. Moisture in a closed van is the start of condensation problems.
- A drying plan. Wipe the tub, unhook the curtain, and let both air out before they go back in the drawer.

Position is the last piece. Our base currently sits a little tight against one side because of where the air conditioner is mounted. In use, it will scoot a few inches out into the aisle for more elbow room. That is the beauty of a portable base: you set it where it works tonight, not where you guessed it would work when you built a wall.
When the Van Shower Wins, and When It Does Not
The in-van shower earns its keep on cold nights, in bug season, and on long dispersed-camping stretches where the nearest public shower is a drive away.

It is not always the best option. At a campground with a clean bathhouse, I will happily use the bathhouse and save my water. On hot summer evenings, an outdoor rinse can be the better fit. Some campgrounds and ranches even build their own open-air showers, and those can be the most memorable rinses of the whole trip.
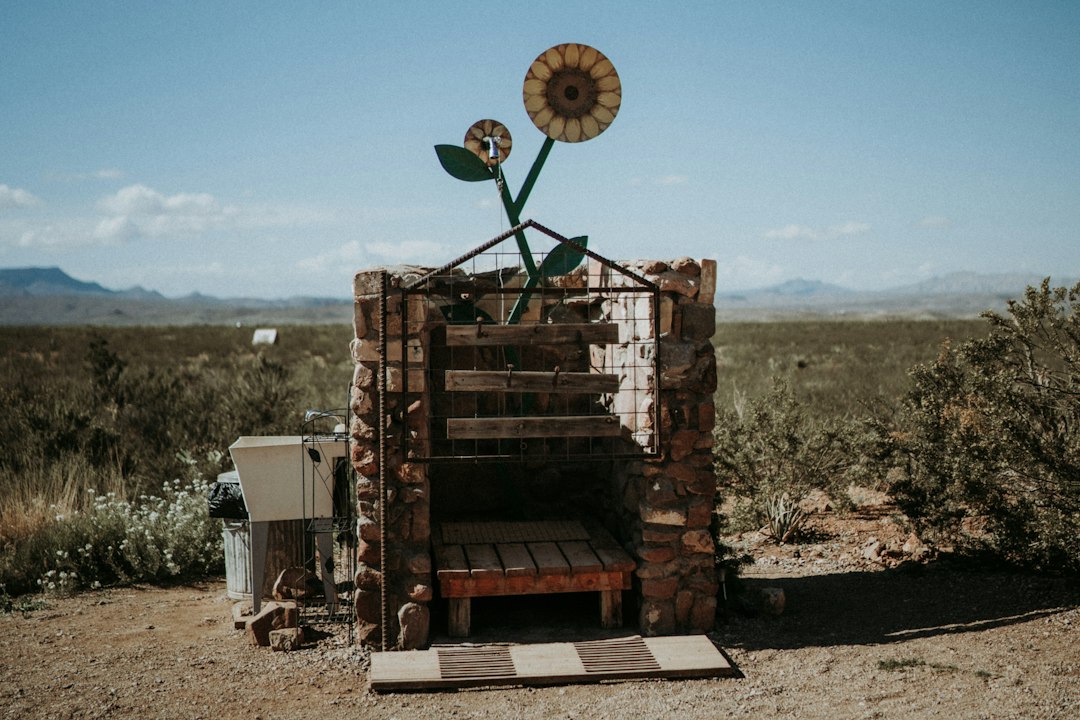
The point is choice: you stop planning routes around showers and still go to bed clean.

Quick Parts Checklist
If you want to build something similar, here is the short list of what lives inside our van, all of which can come out in minutes:
- Shower base: collapsible folding bathtub
- Drain fitting: bathtub through-wall fitting plus a short half-inch NPT extension
- Adhesive: Goop marine contact adhesive
- Water source: faucet diverter kit on the galley sink
- Diverter backup: stainless steel faucet cap
- Shower head: RV shower head with hose and five spray modes
- Thread sealing: PTFE thread seal tape
- Enclosure: clear PEVA shower curtain liner hung from the framing
- After the shower: quick-dry microfiber camping towel and biodegradable camp soap
Below the floor you still need a drain and a grey tank, and that is the one part that is not portable. But everything you step into, hang, and connect folds away into a drawer. For a small van, that is a trade I would make again. It is not spacious, and it never will be. It is a real shower in a van that still has room to live in, and on day four of a dusty trip, that is all I want.