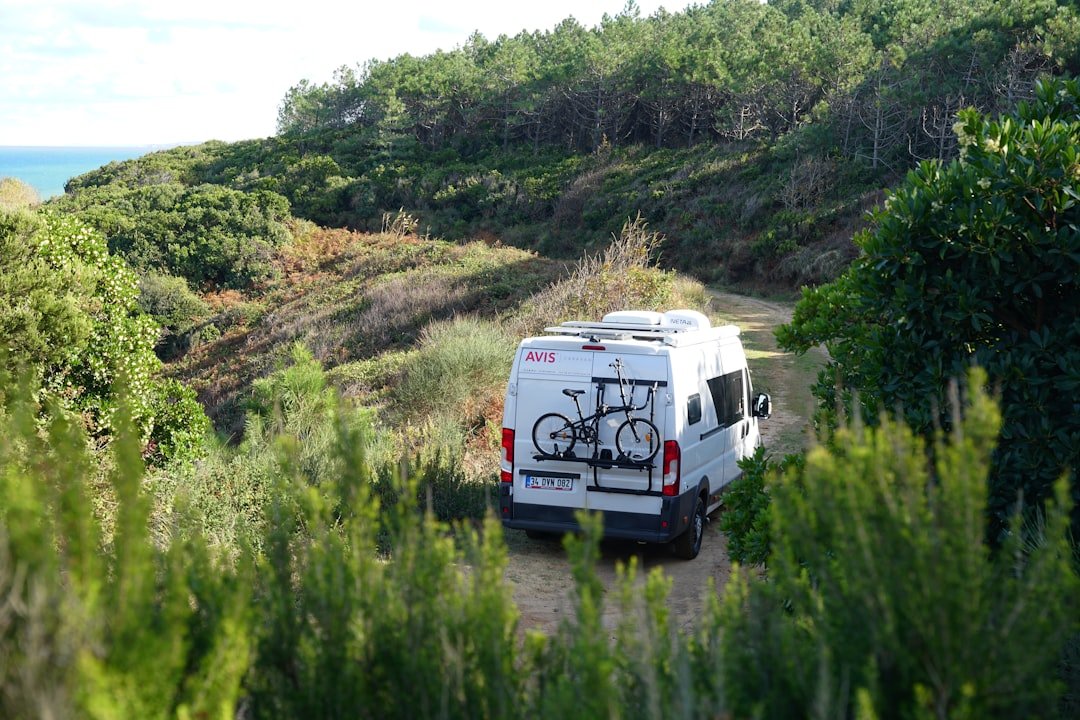
There’s a specific kind of freedom that comes with turning on a faucet in the middle of nowhere and watching clean water flow out. No hookups, no campground fee, no ranger telling you to move along. Just you, your van, and enough water to cook dinner, wash the dishes, and maybe take a quick shower before the stars come out. That freedom doesn’t happen by accident — it starts with a well-designed water system and a tank that’s securely mounted to survive thousands of miles of bumpy backroads.
When I started planning my campervan build, water was the system I understood the least. Electrical? Sure, I could wrap my head around volts and amps. Solar? Panels on the roof, simple enough. But plumbing felt like foreign territory, and the idea of cutting holes in my van to mount a giant plastic tank full of water honestly terrified me. After living with the system for a while now, I can tell you it’s one of the most rewarding parts of the entire build — and nowhere near as complicated as it initially seemed.

Calculating Your Actual Water Needs
Before you buy a tank or cut a single hole, figure out how much water you actually need. This is the question that determines every other decision in your system, and most van builders get it wrong on their first try — either way too little or comically too much.
A good baseline for two people living in a van full-time is five to seven gallons per day. That covers drinking, cooking, basic dishes, and a conservative sponge bath or navy shower. If you want to use your water for anything else — filling a hydration bladder for a day hike, rinsing off mountain bike gear, or giving a dog a bath — budget extra. At seven gallons a day, a 30-gallon tank gives you roughly four days before you need to find a fill-up. A 39-gallon tank pushes that to over five days, which is often the difference between a comfortable boondocking stay and a panicked drive to the nearest RV park.
The math changes if you’re a weekend warrior. Two people camping Friday evening through Sunday afternoon might only burn through ten gallons total, making a compact 20-gallon tank more practical. Think honestly about your travel style, the remote spots you want to reach, and whether you’ll have reliable access to fill-ups along your route.
Choosing the Right Tank Type for Your Van
Not all water tanks are created equal, and the shape of your van’s interior will largely dictate what fits. The three main styles you’ll encounter are rectangular gravity tanks, wheel well tanks, and custom-formed tanks designed for specific vehicle models.
Rectangular tanks are the most common and affordable option. They’re simple boxes that mount under a bed platform or in a garage area, and they work well if you have a straightforward layout with dedicated storage space. The downside is they eat into your precious interior volume — a 30-gallon rectangular tank takes up roughly four cubic feet of space that could otherwise hold gear or food.

Wheel well tanks are designed to nestle over the rear wheel well, taking advantage of otherwise dead space. A 33-gallon wheel well tank designed for Sprinter and Transit vans can give you serious capacity without sacrificing storage. For ProMaster builds, the S&B 39-gallon wheel well tank is a popular choice that maximizes that same awkward cavity. If your wheel well dimensions don’t accommodate the larger tanks, a compact 20-gallon wheel well option might fit better while still providing decent capacity.
The key measurement you need is the exact dimensions of your wheel well cavity — width, length, and the height from the top of the tire to whatever is above it (subfloor, bed platform, or the van’s structural crossmembers). Measure twice, because returning a custom-fit tank is rarely an option.
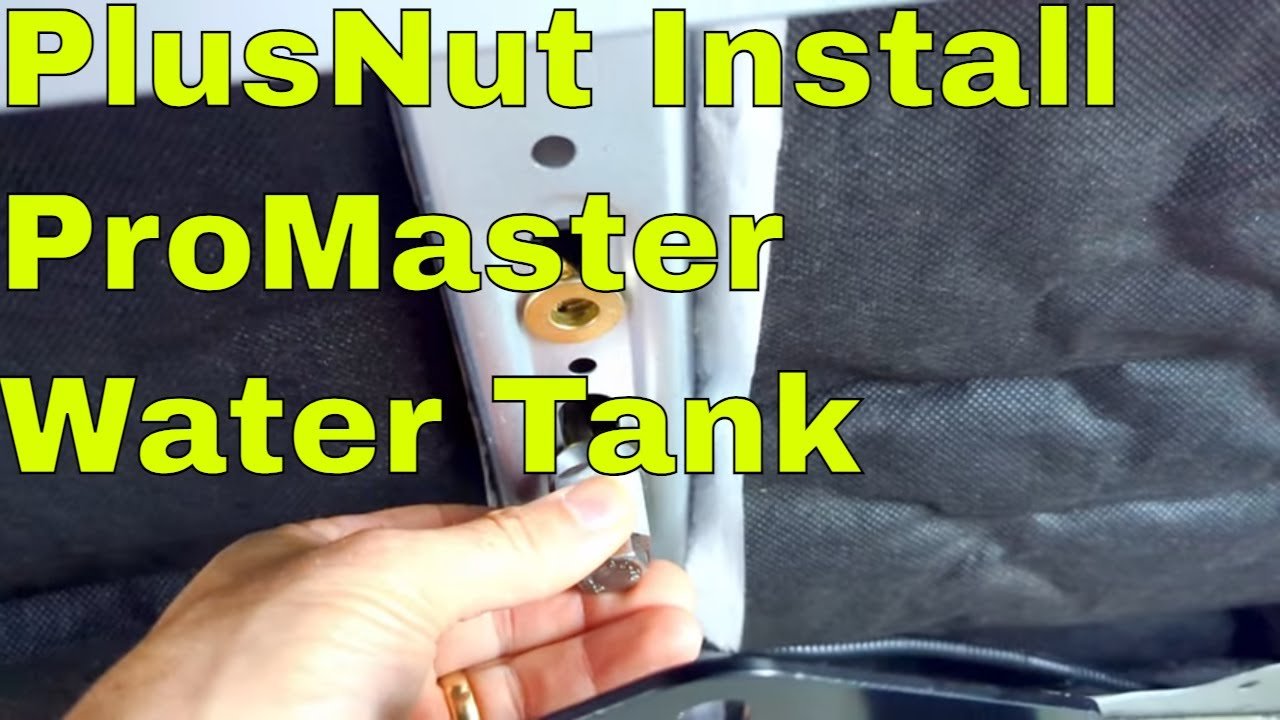
The Fastener Question: Why Plusnuts Are the Answer
Here’s where a lot of van builds go sideways. You have a 300-pound tank full of water bouncing down a washout Forest Service road, and the fasteners holding it to your van’s sheet metal need to handle that dynamic load without pulling loose. Standard sheet metal screws won’t cut it. Rivets can work but don’t have the shear strength for this application. This is where plusnuts — also called rivnuts or nutserts — earn their place in your build.
Plusnuts are blind-side fasteners that create a threaded insert in thin sheet metal. You drill a hole, insert the plusnut, and then use a specialized pulling tool that compresses the back side of the fastener into a bulb shape that locks it permanently in place. The result is a mounting point as strong as a welded nut, but installed in minutes without any welding equipment. The tank manufacturer typically includes the plusnuts with their hardware kit, but you’ll need your own tool to set them.
A quality rivet nut tool kit with multiple mandrel sizes is one of those purchases that pays for itself across a van build. You’ll use it for mounting electrical components, securing cabinet hardware, attaching brackets to the van frame, and dozens of other applications. If you want a more compact option for tight spaces, an AOBEN 14-inch rivnut setter gets into areas where a full-size tool won’t fit.
Tools That Make the Job Painless
Beyond the plusnut tool, mounting a water tank requires a short list of basic mechanical tools. A decent Craftsman socket set will handle most of the bolt-tightening work, and having both SAE and metric sizes means you won’t be caught off guard by whatever hardware came with your tank. A step bit is essential for cleanly enlarging pilot holes to the right diameter for plusnuts. And a good pair of safety glasses — because drilling overhead in a van sends metal shavings everywhere.

The actual process is straightforward even if it’s physically demanding. Each plusnut gets hand-tightened with the activation tool — a long bolt and nut arrangement that draws the fastener into the van body. You’ll use a socket on the end to crank it down, and it takes genuine leverage. Take care not to overtighten, because once the plusnut starts spinning in the hole, getting it back out without damaging the sheet metal is a hassle. The trick is to tighten until you feel the metal bulge behind the panel, then stop.
Once the plusnuts are set and the gold mounting bolts are threaded in, that tank isn’t going anywhere. The fasteners create a rigid mechanical lock that distributes the tank’s weight across multiple points on the van’s structural ribs. It’s the same attachment method used in aircraft assembly, and it’s overkill in the best possible way.
Plumbing It All Together
With the tank mounted, the next step is connecting it to the rest of your water system. This is where you transition from bolts and metal to pipes and pumps — and where the project starts feeling less like fabrication and more like actual plumbing.
Your water system has three basic circuits: fresh water in, pressurized water out, and (if you have one) gray water draining away. The fresh water fill can be as simple as a twist-on cap on the exterior of the van with a hose running to the tank inlet. For the pressurized side, you’ll need a 12-volt water pump that draws from the tank and pushes water to your sink, shower, and any other fixtures.
A reliable 12V self-priming RV water pump with around 4 GPM flow rate is the sweet spot for most van builds. It provides enough pressure for a satisfying shower while sipping battery power. The Shurflo 12V pump is the industry standard that shows up in most professional van conversions, and for good reason — it’s quiet, reliable, and replacement parts are available at any RV dealer.
For the piping itself, PEX tubing has become the default choice for van plumbing. It’s flexible enough to route through tight cavities, doesn’t corrode, handles both hot and cold water, and connects with simple push-fit or crimp fittings. A 100-foot roll of 1/2-inch PEX-B tubing gives you more than enough material for a full van build with room for mistakes and reroutes.
Don’t Skip Water Filtration
If there’s one corner van builders cut too often, it’s water filtration. Filling your tank from a campground spigot or a gas station hose means you’re trusting whatever’s in that pipe. I’ve seen campground water that looked fine coming out of the hose but left sediment in the bottom of a fresh tank after just one fill. A good filter is cheap insurance.

An inline RV water filter with a 0.2-micron rating catches sediment, bacteria, and chemical contaminants before they reach your tank. Mount it between your fill hose and the tank inlet so every drop of water gets filtered on the way in. For an extra layer of protection, a multi-stage filtration system at the sink gives you bottled-water-quality drinking water regardless of where you filled up.
Knowing What’s in the Tank
One of the more frustrating aspects of van life is the mystery of the water gauge. You press a button and some vague display tells you your tank is “1/3 full” — which could mean anything from “start looking for a fill-up” to “you’ve got two more days.” A modern adhesive-sensor tank monitoring system eliminates the guesswork. These systems use external sensors that stick to the outside of your tank — no holes, no probes inside the water — and give you a precise digital readout of exactly how many gallons remain.
This isn’t a luxury item. Knowing your exact water level changes how you plan your days. When you can see that you have 8.3 gallons left, you know you can wash the dishes, make coffee in the morning, and still have enough for a quick rinse before you absolutely need to find water. When the gauge says “1/3,” you’re guessing, and guessing leads to either unnecessary conservation or running dry at the worst possible moment.

Extending Your Supply While Boondocking
Even with a 39-gallon tank, there will be trips where water is the limiting factor. The good news is that small habits can dramatically extend how long your supply lasts. Using a basin in the sink for dishwater instead of letting the tap run saves two to three gallons per meal. A navy shower — thirty seconds to wet down, soap up, then thirty seconds to rinse — uses less than a gallon compared to the fifteen gallons a regular shower consumes. Cooking one-pot meals instead of multi-dish extravaganzas cuts down on cleanup water significantly.
If you’re planning extended off-grid stays, pair your water system with a robust solar setup and you can stay out for a week or more without needing civilization. Look for boondocking spots near natural water sources where a filter and collapsible jug can supplement your supply. A good water filter and a collapsible jug mean you can collect water from a stream or lake for non-potable uses like dishwashing or rinsing gear, reserving your tank water for drinking and cooking.
Maintenance: The Un glamorous Side of Water Freedom
Van water systems aren’t install-and-forget. Every few months, sanitize the tank by adding a measured dose of bleach and circulating it through the system. Check your fittings for weeping — a tiny leak that seems harmless in your driveway becomes a soggy mess when you’re parked on a dirt road. And in winter, either winterize with RV antifreeze or keep your van heated enough that lines don’t freeze and burst.
The plusnuts and mounting hardware should also get an occasional inspection. Vibration is the enemy of any mechanical connection, and while properly installed plusnuts are remarkably durable, a quick torque check on the mounting bolts takes about five minutes and costs nothing. If you notice any rust on exposed fasteners, a dab of paint or corrosion inhibitor will keep things solid.
Water Changes Everything
Building a water system from scratch is one of those van projects that feels intimidating until you’ve done it, then feels obvious in retrospect. The principles are simple: mount the tank securely, plumb it cleanly, filter the water, and monitor the level. Once you’ve got your waste water management sorted alongside your fresh water system, you’ve got the complete package. The execution takes patience and the right tools, but it’s well within reach for anyone who can operate a drill and a socket wrench.
What you get at the end is something that transcends the sum of its parts. A reliable water system means you can wake up at a dispersed campsite with a view of the mountains, brush your teeth, make pour-over coffee, and wash the mug — all without thinking about where the next fill-up is coming from. It means staying an extra day at that perfect spot because you have water to spare. It means the difference between experiencing van life as a series of logistics problems and experiencing it as genuine freedom.
That’s the real return on investment for a few hundred dollars in parts and a weekend of work. Not just water in a tank, but the ability to go further, stay longer, and worry less about the practical details. And isn’t that the whole point?