There comes a moment in every DIY camper van build when you have to do something that feels completely wrong. You’ve spent months carefully planning, measuring, and building — and now you’re about to cut a giant hole in the side of your perfectly good van. It’s terrifying, honestly. But those windows you’ve been dreaming about? The ones that will let morning light pour into your tiny home on wheels and give you a view of wherever you’ve parked for the night? They’re worth every minute of anxiety and every drop of sweat.
Installing windows in a campervan is one of those projects that sounds straightforward until you’re standing in front of a metal wall with a jigsaw in your hand, second-guessing every measurement you’ve taken. The good news is that with the right approach — a solid template, careful marking, and a methodical cutting process — you can pull this off even if you’ve never cut sheet metal before. Here’s everything you need to know about getting windows into your van without turning your build into a disaster movie.
Choosing the Right Windows for Your Van
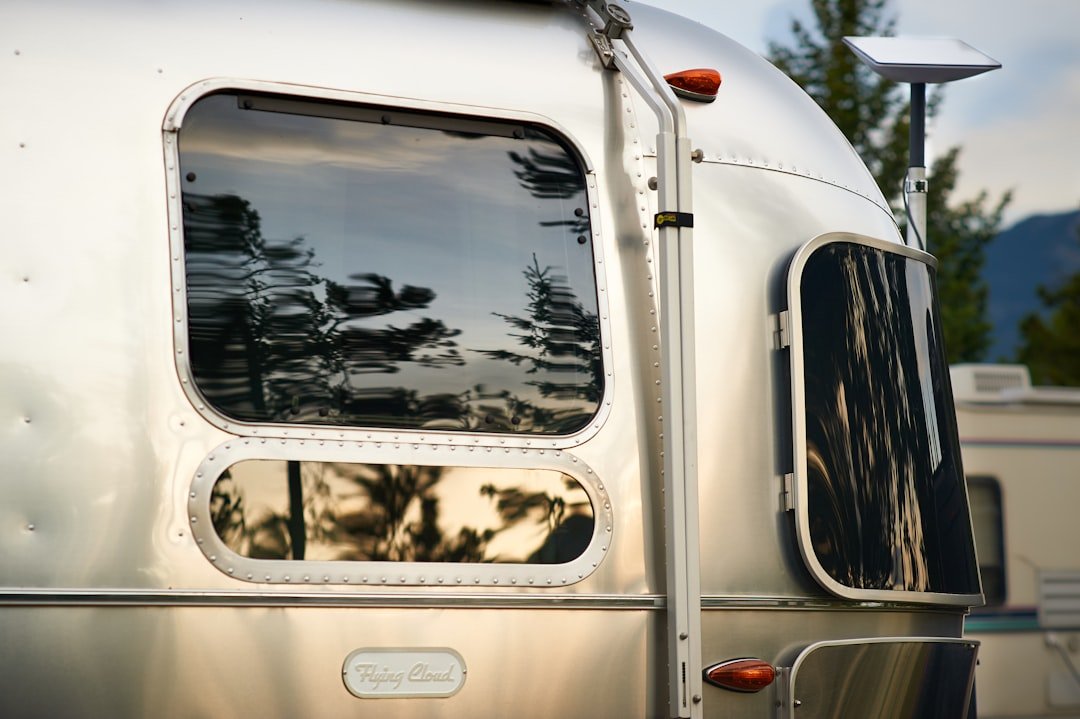
Not all van windows are created equal, and the choices you make at this stage affect everything that comes after. For most camper van conversions, awning-style windows are the go-to option. These push outward from the bottom, creating a small awning effect that keeps rain out while letting fresh air circulate through your living space. The dual-pane acrylic versions provide significantly better insulation than single-pane alternatives, which matters more than you might think when you’re trying to stay comfortable in a metal box during extreme temperatures.
Window sizing is another critical decision. You’re working with the available wall space between structural ribs, furniture placements, and other components like your dinette or bed frame. The universal bunk awning windows available for vans come in a range of standard sizes that fit most conversion layouts. Most builders end up with windows in the 1000mm to 1100mm width range, with heights around 450-500mm. Before ordering, measure your van’s interior wall space multiple times, accounting for the window flange that sits outside the van wall. The flange needs to sit flat against the exterior surface, which means your cutout needs to be precise — slightly smaller than the outer dimensions of the window frame, not larger.
Creating Your Window Template
Here’s where a lot of first-time builders go wrong, and it’s an expensive mistake to make. Your template is the single most important part of this entire process. Get the template right, and the rest flows naturally. Get it wrong, and you’ll be staring at a hole in your van that doesn’t match your window.
Many aftermarket windows — especially the affordable options available online — don’t come with manufacturer templates. This means you need to create one yourself using the actual window frame. The process involves tracing around the frame’s mounting flange onto craft paper, but here’s the crucial detail that trips people up: you need to pay close attention to which part of the frame will sit outside the van wall and which part fits through the hole.
Start by placing the window face-down on a flat surface. Position your craft paper over the back of the frame and trace the inner opening. Then measure the flange width carefully. Your cutout needs to be large enough for the window body to pass through, but small enough that the outer flange completely covers the hole with some margin. The corners deserve special attention — most windows use rounded corners, so don’t try to create sharp right angles in your template. A simple rectangle with rounded edges matching the window frame is all you need.

Marking and Preparing the Van Wall
Once your template is ready, it’s time to transfer those measurements to the van itself. This is a two-person job if you can manage it, but solo builders can absolutely handle it with patience and good painter’s tape.
Start inside the van. Tape your template to the interior wall at your planned window location, making sure it’s level and properly positioned relative to your interior furniture. Check for hidden obstacles behind the wall — structural ribs, wiring runs, and plumbing lines that you definitely don’t want to cut through. Once you’re confident in the placement, drill three small pilot holes through the template and through the van wall at strategic corners. These pilot holes serve as reference points that you’ll use on the exterior.
Move outside the van and locate your pilot holes. Apply painter’s tape to the exterior paint in the area where you’ll be cutting — this protects the finish from the jigsaw base plate and gives you a surface to mark on. Using a straightedge and square, transfer the template outline onto the tape, connecting the pilot holes with precise lines. Double-check every measurement at this stage. The difference between a window that fits perfectly and one that doesn’t can be as small as an eighth of an inch.
The Tools That Make This Possible
Cutting through sheet metal isn’t the same as cutting through wood, and having the right tools makes all the difference between a clean cut and a jagged mess. The star of the show is a quality jigsaw fitted with a metal-cutting blade. You’ll also need a step drill bit for creating starter holes, aviation tin snips for removing internal support brackets, and a drill with standard bits for pilot holes.

The jigsaw blades deserve special mention. You want blades specifically designed for metal cutting — they have much finer teeth than wood blades and are typically made from bi-metal material that can handle the abuse. Don’t cheap out here. A good metal-cutting blade will give you cleaner cuts with less vibration, which means less risk of your cut wandering off the line.
Cutting the Hole: Technique Matters
Here’s where the rubber meets the road — or more accurately, where the blade meets the metal. Start by using your step bit to create a starter hole large enough to fit the jigsaw blade through. Place this starter hole at one corner of your cutout area, inside the marked lines.
Begin cutting along your marked lines, but here’s a pro tip that saves a lot of headaches: don’t cut all the way around in one continuous pass. Instead, cut most of the perimeter but leave small tabs — about an inch of uncut metal — at two or three points. These tabs hold the metal panel in place and prevent it from vibrating wildly as you make your final cuts. Once you’ve cut everything except the tabs, go back and cut through those last connections. The panel will come out cleanly and the metal won’t dance around while you’re trying to make precise cuts near the end.
The cutting process generates metal shavings and sharp edges, so wear eye protection and gloves. Take your time — rushing through metal cuts is how you end up with wavy lines and a window that doesn’t seal properly. A steady hand and moderate blade speed will give you much cleaner results than forcing the blade through at maximum speed.
Dealing with Internal Supports
Depending on your van model and where you’re placing your windows, you may encounter internal support beams or brackets inside the wall cavity. On the Ram ProMaster, for example, there are horizontal support channels that run through the wall at various heights. If one of these falls within your window cutout area, you’ll need to remove the portion that’s in the way.
Aviation tin snips work well for this. Cut the support beam as close to the edge of your window opening as possible, removing just enough material to let the window sit flat. Be careful not to cut into the exterior skin while you’re snipping away at interior supports. It’s a tight workspace, so take it slow and make sure you can see what you’re cutting at all times.

Rust Prevention: Don’t Skip This Step
The moment you cut through the van’s painted metal surface, you’ve exposed bare steel to the elements. Even if you live in a dry climate, moisture will find its way to those exposed edges eventually. Rust is the silent killer of van builds — it starts invisible, spreads underneath your carefully installed window seal, and years later you’re dealing with water intrusion that could have been prevented with twenty minutes of work.
After removing the metal panel and cleaning up any rough edges, clean the exposed bare metal with alcohol to remove oils and debris. Then apply a rust-preventative coating to all exposed edges. Rust-Oleum spray paint or a similar rust-inhibiting product works well for this purpose. Apply at least two coats and let each one dry completely before moving on. This is tedious, unglamorous work that nobody will ever see or compliment you on — but your future self will thank you every time it rains.

Sealing and Installation
With the hole cut and the edges treated, you’re ready to install the window. The sealing method depends on your specific window type, but the general approach involves creating a watertight seal between the window flange and the van’s exterior surface. Most builders use butyl tape applied to the window flange, which creates a gasket-like seal when the window is pressed into place and the mounting screws are tightened.
Apply the butyl tape around the entire perimeter of the window flange, making sure there are no gaps. If your van has ridges or grooves in the exterior surface (and most do), you may need to build up the tape in the low spots to ensure even contact across the entire flange. Press the window into the opening, making sure it’s centered and level, then install the mounting screws from inside the van. Tighten them gradually in a crossing pattern — don’t crank one side down tight before moving to the next. Even pressure distribution is key to getting a consistent seal.
Finish up by applying a bead of self-leveling lap sealant around the exterior perimeter of the window flange where it meets the van wall. This is your second line of defense against water intrusion and it’s worth doing carefully.

What About the Sliding Door?
The sliding door is a popular window location on camper vans, and it comes with its own set of considerations. The door panel is typically thinner than the van’s side walls, which actually makes cutting easier, but you need to be mindful of the door mechanism. There are tracks, rollers, and latch hardware inside the door that you absolutely cannot cut through.
Before marking your cut lines on the sliding door, open the door and study the internal components carefully. Identify where the tracks run and where the latch mechanism sits. Your window needs to fit in the space between these components, which may limit your maximum window size. Measure the available space inside the door cavity before ordering your window, not after.
Living With Your New Windows
The first time you wake up in your van and see sunlight streaming through windows you installed yourself — windows you cut through metal to create — there’s a specific kind of pride that hits you. It’s different from the satisfaction of buying something off the shelf. You literally changed the shape of your van to let more of the world in.

Those windows change how you experience van life in ways you might not expect. Cooking dinner while watching the sun set through your dinette window. Lying in bed and seeing stars through the sliding door glass. Being able to crack a window open for airflow without leaving your van vulnerable. These seem like small things until you’re living in 80 square feet and every design decision, every cut you made in that metal wall, shapes your daily experience on the road.
If you’re planning your own van build, don’t let the fear of cutting holes stop you. As with most things in van life, the preparation matters more than the execution. Take your time with the template, mark everything twice, and cut once. The views waiting on the other side of that metal wall are worth the effort.
For more van build guidance, check out our articles on soundproofing your campervan and installing a roof vent fan — two projects that pair perfectly with your window installation and will make your van significantly more comfortable for long-term travel. You might also find our guide to insulating your van floor helpful as you continue building out your home on wheels, and our piece on building a van life water system covers another essential off-grid upgrade.