Breathing easy inside a campervan isn’t something most travelers think about until they’re gasping for fresh air at 2 a.m. in a humid Florida campground. The difference between a van that feels like a sauna and one that stays pleasant through every season comes down to a single component that costs less than a night at a budget motel: a properly installed roof vent fan. After spending weeks researching ventilation options for a Ram ProMaster conversion, I discovered that the standard advice about “just get a 14-inch MaxxAir” doesn’t account for the reality many van builders face when roof real estate becomes precious.
Modern campervan conversions are packing more onto the roof than ever before. Between solar arrays that stretch edge to edge, satellite internet dishes, and antenna mounts, finding a clear 14-by-14-inch opening for a standard fan has become a genuine puzzle. That’s where compact 11-inch vent fans enter the conversation, and honestly, they deserve way more attention than they get.

Why Ventilation Matters More Than You Think
Condensation is the silent destroyer of van builds. Every night, your body releases roughly a liter of moisture through breathing and perspiration. In a metal box with limited insulation, that moisture has nowhere to go except into your walls, your mattress, and your electronics. Over time, mold takes hold, materials degrade, and that new-van smell gets replaced by something decidedly unpleasant. A quality roof fan — like the ones designed specifically for RV applications — constantly exchanges humid interior air with fresh outside air, breaking the condensation cycle before it starts.
Beyond moisture control, ventilation transforms the daily experience of living in a van. Cooking bacon without proper airflow turns your home on wheels into a greasy sauna. Hot summer days turn a parked van into an oven that can exceed 130 degrees Fahrenheit. Even in mild weather, two adults breathing in a space smaller than most walk-in closets creates stale air that affects sleep quality, mood, and overall comfort. A reliable 12-volt vent fan running on low speed solves all of these problems while drawing less power than a single LED light bulb.
Standard 14-Inch Fans vs. Compact 11-Inch Options
The RV industry has standardized around the 14-by-14-inch roof opening for decades. Fans like the MaxxAir Deluxe, Fantastic Fan, and Dometic FreshJet all conform to this size, which means most installation guides, accessories, and replacement parts assume you’re working with that footprint. For a simple van build with plenty of open roof space, going with the standard size makes perfect sense.
But here’s the catch: not every van has the luxury of open roof space. The Ram ProMaster, for instance, has structural ribs running across the roof that limit where you can safely cut. Add four solar panels, a Starlink dish, and the need to keep everything as low-profile as possible for garage clearance and fuel efficiency, and suddenly that 14-inch opening becomes impossible to place without compromising something else. Compact fans measuring 11 inches square fit into gaps that standard fans simply cannot, opening up layout possibilities that would otherwise require painful compromises.
The tradeoff is airflow capacity. An 11-inch fan moves roughly 60-70% of the air that a 14-inch model handles at the same speed. For most two-person van setups, that’s still plenty of ventilation. The key is choosing a model with multiple speed settings and reverse capability so you can tailor the airflow to conditions. Six-speed reversible fans give you everything from a gentle breeze for sleeping to maximum extraction when cooking or after a shower.
Planning Your Fan Placement
Location determines everything about how well your fan performs. The ideal spot balances structural safety, airflow efficiency, and integration with your interior layout. Most van builders place the fan near the center of the living area or over the bed, since these are the spaces where air quality matters most during the hours you spend inside.
Before committing to a location, you need to check what’s happening on the inside of the roof. Structural supports, wiring harnesses, and factory-installed components can hide behind the headliner and create expensive surprises when you start cutting. Drilling a small pilot hole from the inside and checking for obstructions with a wire or probe takes five minutes and can save you from a costly mistake. If you find a support beam where you planned to cut, shifting the fan location by even an inch or two might solve the problem.
Consider the relationship between your fan and other roof components too. Just as proper insulation works as a system rather than isolated pieces, your ventilation interacts with windows, doors, and any other openings. Positioning the fan so it pulls air across the longest dimension of your living space creates the most effective cross-ventilation when paired with an open window or the sliding door.
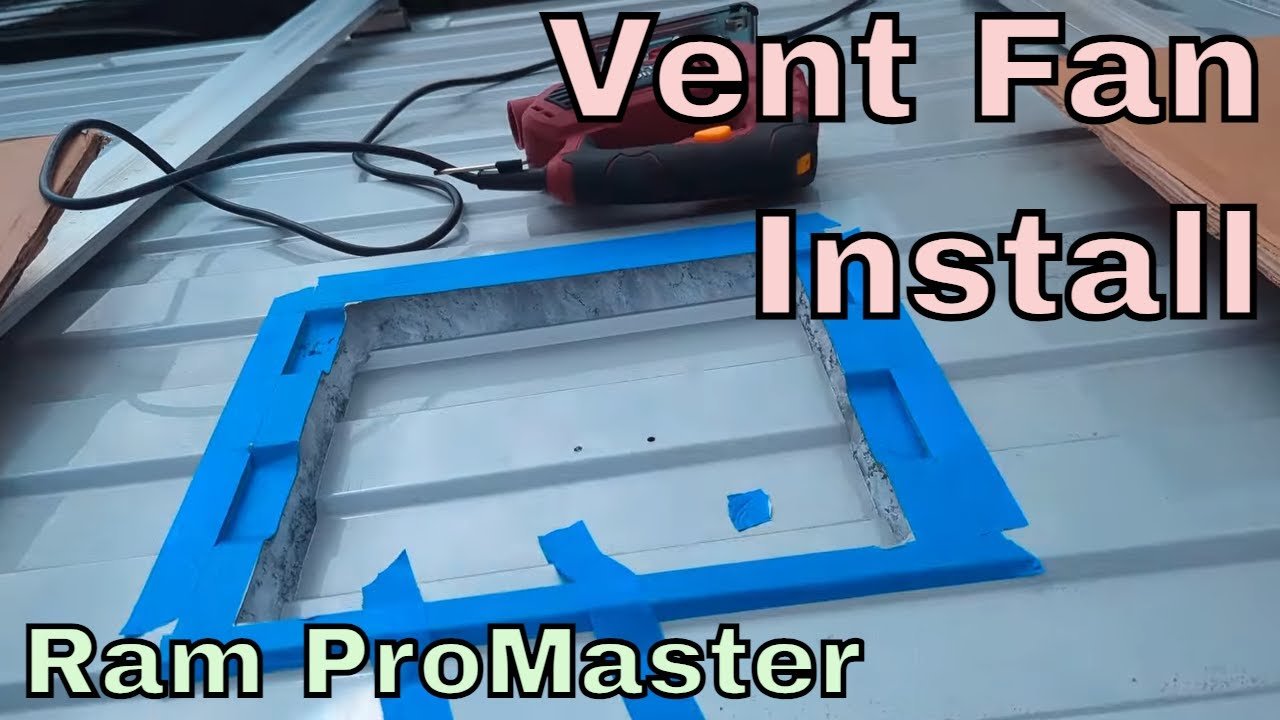
The Cutting Process: Precision Without Panic
Cutting a hole in the roof of your van feels terrifying the first time. That’s a completely normal reaction. The key is breaking the process into controlled steps that eliminate the chance of major errors. Start by making an accurate template from the fan’s documentation, then transfer that template to the roof using painter’s tape to protect the paint.
Use a step bit to create starter holes at each corner of the cutout area. These pilot holes give you precise reference points and make it easy to verify your measurements before committing to the full cut. A jigsaw with a fine metal-cutting blade handles the actual cutting beautifully. Rather than cutting the entire perimeter in one go, leave small tabs of metal connecting the panel. This reduces vibration and prevents the cut piece from dropping unexpectedly. Once you’ve cut most of the outline, snip the remaining tabs with tin snips for a clean removal.

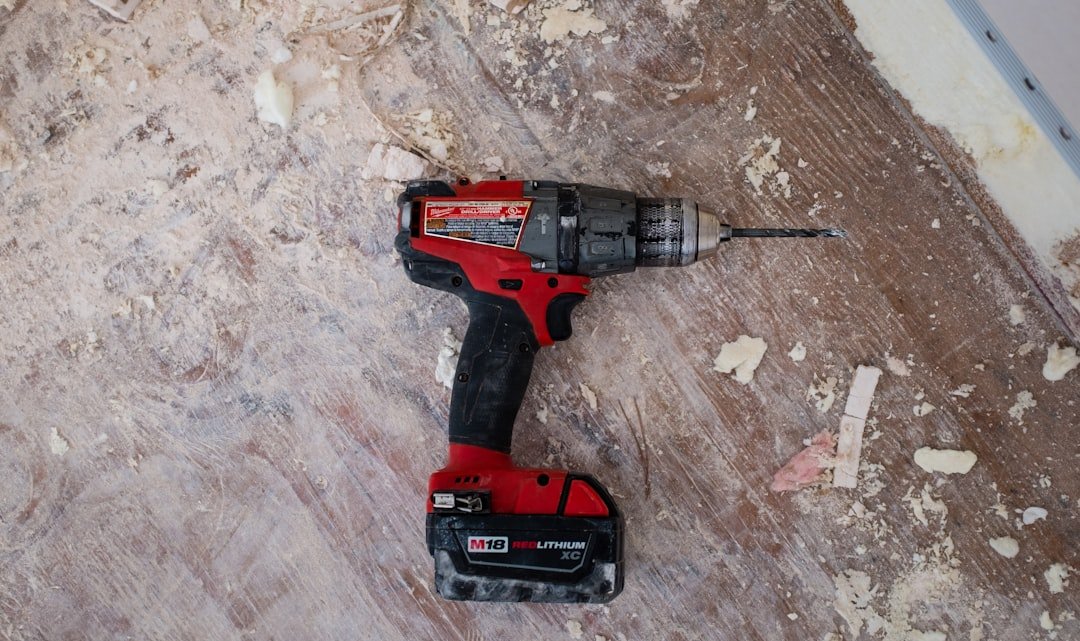
After removing the metal panel, immediately address the exposed edges. Bare steel will rust faster than you’d expect, especially in humid climates or coastal areas. Clean the cut edges with rubbing alcohol, apply a rust-inhibiting primer, and let it cure completely before moving on. This step takes an extra hour but adds years to the life of your installation. A quality step bit and metal-cutting jigsaw blade are worth the investment for this project alone.
Waterproofing: Where Most Installations Fail
The single most critical part of any roof penetration is the waterproofing. This is not the place to cut corners or rush through the job. Van roofs aren’t flat — they have ridges, channels, and varying heights that create gaps between the fan flange and the metal surface. Failing to bridge those gaps properly guarantees leaks that will damage your interior and potentially your electrical system.
Butyl tape is your best friend here. This sticky, putty-like material stays flexible permanently and fills gaps better than any caulk or sealant alone. Apply it to the bottom of the fan flange, building up extra layers in the low spots where the roof dips between ribs. Start from the back edge (the hinge side of the fan) and work forward, overlapping seams so water flows over them rather than into them. Think of it like roofing shingles: every overlap should shed water away from the opening.
Once the fan is set in place and screwed down with even pressure across all mounting points — tighten in a star pattern, not sequentially — apply self-leveling lap sealant over every screw head and along all the edges of the flange. This sealant flows into tiny gaps and creates a rubber-like barrier that moves with the van as it flexes down the road. Self-leveling sealant is specifically formulated for this application and should not be substituted with general-purpose caulk.
Wiring for Simplicity and Reliability
Most 12-volt vent fans require only two wires: positive and negative. The simplicity is a gift for van builders who might be intimidated by electrical work. Connect the fan directly to your house battery system through an appropriately sized fuse, and you’re essentially done. Some fans include a thermostat that automatically adjusts speed based on temperature, which is a nice upgrade for anyone who forgets to turn the fan on before the van heats up.

If your fan has a reverse function, wire it so that warm-weather mode pushes hot air out (exhaust) and cold-weather mode pulls fresh air in (intake). The exhaust mode is dramatically more effective for cooling because it leverages the natural tendency of hot air to rise. When the fan pulls air from the living space, replacement air enters through slightly opened windows or vents, creating a consistent flow that keeps temperatures manageable even in direct sun.
Consider adding a speed controller if your fan doesn’t have one built in. Running the fan on its lowest setting overnight uses minimal battery power while maintaining continuous air exchange. The silence of a low-speed fan is important too — you don’t want a howling gale keeping you awake when all you need is gentle circulation. For anyone building a complete van ventilation system, the power draw at low speed typically measures between 0.3 and 0.5 amps, meaning even a modest battery can run the fan for days.
Integrating Ventilation with Your Overall Van Design
A vent fan works best as part of a complete climate strategy rather than a standalone solution. Soundproofing materials that reduce road noise often have thermal benefits too, keeping the interior cooler in summer and warmer in winter. Combine insulation with strategic window placement, and your fan doesn’t have to work as hard to maintain comfortable conditions.
Think about airflow paths when designing your interior layout. A fan positioned at one end of the van with a window at the other creates a natural breeze corridor. Avoid blocking this path with tall cabinets or solid walls that force air to take indirect routes. If you have a shower area, consider how the fan will extract humid air from that space — positioning it near the shower and ensuring there’s a gap under the bathroom door or privacy wall allows moist air to reach the fan efficiently.
For van builders in extreme climates, a dual-fan setup offers the ultimate in temperature control. One fan positioned low on a wall or in the floor pulls cool night air in, while the roof fan pushes hot air out. This chimney effect can drop interior temperatures by 20 degrees or more during summer nights, making the difference between a restful sleep and a miserable, sweaty ordeal.

Maintenance and Troubleshooting
Once installed, a quality vent fan requires remarkably little maintenance. Inspect the sealant around the flange twice a year — once before winter and once after — and touch up any areas where the sealant has cracked or pulled away from the metal. The fan lid mechanism benefits from an occasional spray of silicone lubricant to keep the hinge moving smoothly, especially in dusty environments.
If the fan starts making unusual noises, check for debris in the blade housing before assuming the motor is failing. Leaves, twigs, and even small insects can find their way into the fan housing during travel and create rattling sounds that mimic mechanical problems. A quick clean with a soft brush usually resolves the issue. For fans with electronic controls, a faulty speed setting often traces back to corroded wire connections rather than a failed circuit board. Keep electrical contact cleaner in your toolkit for these moments. Clean the terminals with electrical contact cleaner and apply dielectric grease to prevent future corrosion.
The lid seal deserves attention too. UV exposure degrades rubber gaskets over time, and a lid that doesn’t seal properly lets rain in during travel even when the fan is closed. Replacement gaskets are inexpensive and take minutes to swap out. If you notice water pooling around the fan after rain, don’t ignore it — a small leak becomes a big problem faster than you’d expect in a confined living space.
Making the Right Choice for Your Build
Whether you go with a standard 14-inch fan or a compact 11-inch model, the important thing is getting ventilation installed before you start spending nights in your van. The comfort difference is immediate and dramatic. Quality 12-volt vent fans start around $100 for basic models and reach $250 for premium units with thermostats, rain sensors, and variable speed controls. Even the most expensive fan costs less than a single hotel night, and it keeps paying dividends for the entire life of your van.
For builders working with tight roof layouts, don’t let the 14-inch standard discourage you. Compact fans deliver meaningful airflow in a smaller package, and the installation process is identical — just with less cutting. The key is matching the fan to your specific needs, installing it with meticulous waterproofing, and maintaining it through the seasons. Do those three things right, and every night in your van will breathe easier than the last.